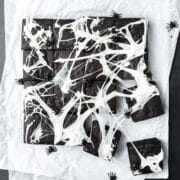
These black cocoa brownies are made with black cocoa powder and decorated with super easy marshmallow spiderwebs for a fun, spooky Halloween treat that both kids and adults will love!
Since they're naturally colored with black cocoa powder, you don't need any food coloring, and they won't stain your teeth!

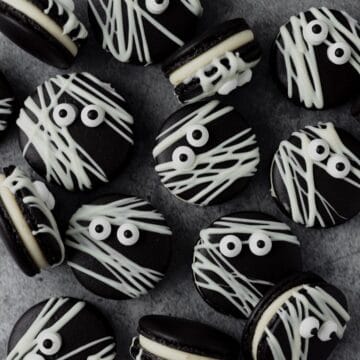
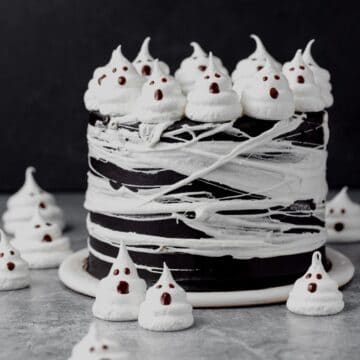
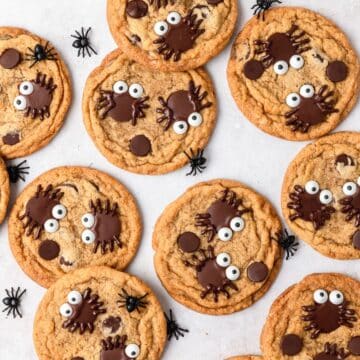
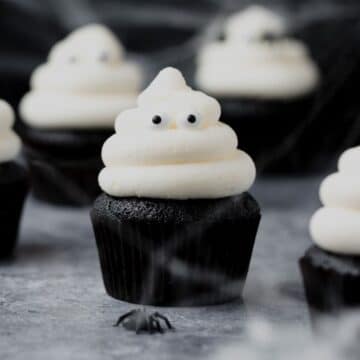
You might also like these Halloween spider cookies or these black cocoa cupcakes!
Jump to:
Ingredient Notes
You just need a few ingredients to make these black cocoa brownies for Halloween!

Black Cocoa - Black cocoa is one of my favorite secret ingredients! Black cocoa is just cocoa powder that has been heavily dutched (meaning the acidity has been neutralized), so it gives you a rich black color but doesn't stain! You don't have to use black cocoa powder for these brownies, but regular cocoa just won't give you the same fun effect, so I highly recommend it! I like both the King Arthur Flour Black Cocoa or the Modern Mountain Company Black Cocoa!
Dutch Processed Cocoa Powder - Since black cocoa has a less chocolatey flavor than regular dutch cocoa, I like to use a mix of both in these brownies! My go-to cocoa powder that I use in all my baking is the King Arthur Flour Triple Cocoa Blend! It's a blend of natural, Dutch, and black cocoa and can be used in any recipe! However, you can use any Dutch processed cocoa that you have on hand!
Espresso Powder - This is optional, but I love how espresso powder enhances and deepens the chocolate flavor! King Arthur is my favorite brand of high quality espresso powder. Note: espresso powder is NOT the same as instant espresso!! Espresso powder is much more flavorful and more finely ground, making it more suitable for baking.
The complete list of ingredients and amounts is located in the recipe card below.
How to Make Black Cocoa Brownies
Preheat the oven to 350°F.
Whisk together the melted butter, brown sugar, granulated sugar, and vanilla extract.
Add in the eggs one at a time and whisk each one until fully incorporated and the batter starts to get lighter in color. To get crinkly brownie tops, be sure to whisk the sugar and eggs for at least 4-5 minutes (a hand mixer is very helpful for this).


Fold in the black cocoa powder, dutch cocoa powder, flour, espresso powder, and salt and mix until the batter is just combined. It will be thick.


Cut a parchment paper sling slightly smaller than the width of the cake pan and make sure it fits flatly in the bottom. Then lightly spray the bottom and sides of the pan with a vegetable oil based spray (I love Bakers Joy or Everbake). Place you parchment paper sling in the bottom of the pan and smooth it out so that it sticks to the pan spray (you can use metal binder clips to secure it to the pan). After baking you’ll be able to just slide the brownies right out of the pan!
I love all of my USA Pan cake pans because they are extremely sturdy and truly nonstick. However, I still like to prepare my pans to ensure the black cocoa brownies come out easily.
Smooth the brownie batter into the prepared pan.


Bake at 350°F for 30-40 minutes or until an inserted knife comes out mostly clean.
Remove from the oven and let cool completely in the pan. Then use the parchment sling to remove the black cocoa brownies.

Marshmallow Spiderwebs
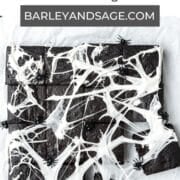
These fudgy black cocoa brownies are delicious on their own year round! But the deep black color also makes them perfect for Halloween! Top with melted marshmallow spiderwebs for a simple spooky treat!
Marshmallow spiderwebs are simple to make but they are super messy!
All you have to do is place the marshmallows in a microwave safe bowl (I prefer glass) and microwave for 10-20 seconds. Note the marshmallows will be very hot! Stir the marshmallows until smooth and let cool for 1-2 minutes until you have a thick, stringy goop that is no longer hot to touch.
There are two options for spreading the marshmallows on the brownies:
- Use two forks to pull strings of the melted marshmallow and spread across the top of the brownies.
- Wearing disposable vinyl gloves, use your hands to spread the marshmallows across the top.
Just remember, this is messy but so fun!

[You can find these cute little plastic spiders on amazon to top the spiderweb brownies!]

Tips for the Best Brownies!
(and blondies too!)
Use room temperature ingredients! Always make sure ingredients like butter, eggs, milk, etc. are at room temperature before baking (unless the recipe indicates otherwise)! This ensures they'll incorporate into the batter more easily and leads to overall better texture. Remove all ingredients from the fridge 30 minutes to an hour before baking for best results.
Measure your flour correctly! It's most accurate to use a kitchen scale, but if you're measuring by volume you want to spoon and level! Fluff up the flour a bit with a spoon, and then spoon flour into the measuring cup. Once it's overflowing, use the back of a knife to level it off. Don't ever pack flour into the measuring cup or you'll end up with way too much! Improperly measured flour can lead to dry, dense baked goods. Same goes for cocoa powder!
Use an oven thermometer! Just because your oven says it's 350, doesn't mean it is! If you oven hasn't been calibrated recently, it can be as much as 30 degrees off, which will negatively affect all baked goods from cakes to macarons! An oven thermometer is the easiest/cheapest way to ensure your oven is always at the proper temperature.
Use a metal baking pan! Not all materials are created equal when it comes to baking. Metal cake pans conduct heat much better than other materials like glass or ceramic, so your baked goods will cook faster and more evenly!
It's better to undercook the brownies slightly, than overcook them! Brownies will dry out quick, so it's best to err on the side of caution when baking brownies! Bake just until an inserted toothpick comes out mostly clean but still a tad gooey. If you aren't sure, just go ahead and take them out because they'll continue to firm up as they cool. Note: the larger the pan, the less time the brownies will take to cook.
Be patient and let them cool. Warm brownies fresh out of the oven are delish, I know. But it's best to let them fully cool before digging in. The brownies will be less likely to crumble when you cut them and the center is more likely to be fully cooked while still being perfectly fudgy.

Recipe FAQ's
Brownies are best eaten within the first 2-3 days, but will keep in an airtight container at room temperature for up to 5 days.
To get clean slices of these black cocoa brownies, run a super sharp knife under hot water until the blade is warm, then wipe it dry. Then cut a single slice and repeat. It's a bit tedious to clean the knife before every cut, but you get perfect slices every time!
Yes! These brownies can be frozen for up to 3 months! I recommend cutting the brownies into squares before freezing. To thaw, you can either place in the fridge overnight or reheat in the microwave. Then top with marshmallows after thawing.
I recommend using black cocoa powder if you can find it for a fun, spooky black color, but you can use dutch cocoa powder instead!
To get crinkly tops on your black cocoa brownies, be sure to beat the eggs and sugar together for at least 4-5 minutes! This incorporates extra air into the batter which is what helps form those crinkly tops!

Tips for Success!
For best results I always recommend using weight measurements (especially when baking) because it's the most accurate. Kitchen scales are super affordable and also reduce the number of dishes you have to do! However, all my recipes also include US customary measurements for convince. Use this chart to convert measurements for common ingredients!
Substitutions: In all my recipes, I've included substitutions that I know will work, but I cannot guarantee results if you substitute ingredients that I have not recommended. [For example, granulated sugar and honey are indeed both sweeteners but they have very different properties so they can not always be swapped 1:1. Using honey in a cookie recipe that calls for granulated sugar will yield a giant mess.] In the recipe card you'll find links to the specific ingredients/brands that I use.
A note on salt: I almost exclusively use Diamond Crystal Kosher Salt because it's the best all-purpose salt for cooking and baking. If you're not using kosher salt, consult this handy guide for a conversion chart! When in doubt, if you're using table salt just reduce the amount by half for baked goods. When cooking, I prefer to under-salt because you can always add more! If you've over-salted, adding a little bit of acid (like lemon juice) can help.
If you make this recipe, please leave a star rating at the bottom of the page! This provides helpful feedback to both me and other readers. And if you want more delicious, scratch-made recipes you can subscribe to my newsletter and follow along on Instagram, Pinterest, and Facebook!
Recipe Card
Black Cocoa Brownies
Special Equipment
Ingredients
Brownies
- 1 ¼ cup unsalted butter, melted
- 1 ½ cups light brown sugar
- 1 cup granulated sugar
- 1 teaspoon vanilla extract
- 4 large eggs, room temperature
- ¾ cup black cocoa powder
- ¾ cup unsweetened Dutch cocoa powder
- ¾ cup all purpose flour
- 1 teaspoon espresso powder, optional
- ½ teaspoon kosher salt
Topping
- 1 cup marshmallows, melted
Instructions
Brownies
- Preheat the oven to 350°F.
- Whisk together the melted butter, brown sugar, granulated sugar, and vanilla extract.
- Add in the eggs one at a time and whisk each one until fully incorporated and the batter starts to get lighter in color. To get crinkly brownie tops, be sure to whisk the sugar and eggs for at least 4-5 minutes (a hand mixer is very helpful for this).
- Fold in the black cocoa powder, dutch cocoa powder, flour, espresso powder, and salt and mix until the batter is just combined. It will be thick.
- Cut a parchment paper sling slightly smaller than the width of the cake pan and make sure it fits flatly in the bottom. Then lightly spray the bottom and sides of the pan with a vegetable oil based spray. Place you parchment paper sling in the bottom of the pan and smooth it out so that it sticks to the pan spray (you can use metal binder clips to secure it to the pan). After baking you’ll be able to just slide the brownies right out of the pan!
- Smooth the brownie batter into the prepared pan.
- Bake at 350°F for 30-40 minutes or until an inserted knife comes out mostly clean. You want the center to still just be slightly wet because the brownies will continue to cook as they cool.
- Remove from the oven and let cool completely in the pan. Then remove using the parchment sling.
Marshmallow Spiderwebs
- All you have to do is place the marshmallows in a microwave safe bowl (I prefer glass) and microwave for 10-20 seconds. Note the marshmallows will be very hot!
- Stir the marshmallows until smooth and let cool for 1-2 minutes until you have a thick, stringy goop that is no longer hot to touch.
- There are two options for spreading the marshmallows on the brownies: Use two forks to pull strings of the melted marshmallow and spread across the top of the brownies. Or while wearing disposable vinyl gloves, use your hands to spread the marshmallows across the top.
Notes
Nutrition
The nutritional information on this website is only an estimate and is provided for convenience and as a courtesy only. The accuracy of the nutritional information for any recipe on this site is not guaranteed.

Caroline says
I'm at 6500' elevation. I added a little extra flour and water and cooked it in a 9x9 pan. It took over an hour to cook and then the edges were super dry and overcooked and the middle was still a little wet. I loved the flavor but what proper alterations do I need to make?
Kyleigh Sage says
I’m so sorry they didn’t turn out! Unfortunately I don’t have experience baking at high altitude so I don’t know how to make those adjustments. But there are some great high altitude bloggers you should check out!
This chart should be helpful (but again I don’t have first hand experience) https://www.kingarthurbaking.com/learn/resources/high-altitude-baking
https://mountainmamacooks.com/high-altitude/
And this is one of my friends who specializes in high altitude baking! https://curlygirlkitchen.com