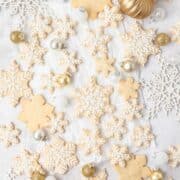
These Christmas shortbread cookies are shaped like snowflakes for the perfect easy Christmas cookie! Making these cookies is one of my favorite parts of the holiday season. They're great for making at home with the kiddos or giving out to friends and family!

Jump to:
Why You'll Love These Snowflake Christmas Cookies!
These snowflake royal icing cookies are on repeat all winter long!
- Super easy to make and decorate!
- They're light, buttery, and not too sweet.
- The perfect Christmas cookies for a holiday party, cookie exchange, or to leave out for Santa!
- A perfect garnish for Christmas cupcakes or served with a big mug of hot chocolate!
You might also like these classic gingerbread cookies or these snowflake linzer cookies.
Ingredient Notes
These snowflake cookies use my classic easy shortbread cookie recipe! It’s buttery and crumbly without being too dry. You only need 4 basic ingredients, but I like to add in a few extras for flavor!

Almond Flour - I like substituting a portion of the all purpose flour with almond flour in all my cookies! It yields a more tender cookie with just that slight almond flavor. But you can leave it out if desired!
Vanilla Extract - A little bit of vanilla extract yields a classic shortbread cookie. But for a more Christmasy flavor you can substitute peppermint extract, anise extract, or orange extract!
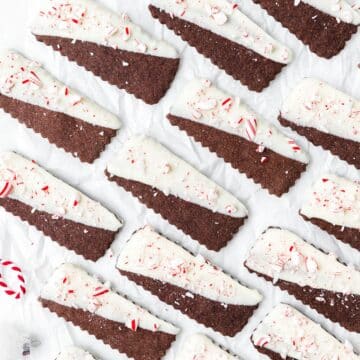
If you want chocolate cookies, you might like these chocolate peppermint shortbread!
The complete list of ingredients and amounts is located in the recipe card below.
How to Make Shortbread Cutout Cookies
Using a stand mixer fitted with the paddle attachment, cream together the softened butter and powdered sugar until light and fluffy.
Then add in the vanilla extract and mix until fully combined.


Mix in the flour and salt until just combined. The dough should come together into a soft but not sticky ball.


Divide in half and press the dough into discs. Wrap tightly in plastic wrap and refrigerate overnight (or a minimum of at least 2 hours).

Line 2 baking sheets with parchment paper and set aside.
On a lightly floured surface, roll out the dough to your desired thickness (I like between ¼ and ½ inch thick). Then cut out the cookies into your desired shapes.


For these Christmas shortbread cookies, I used these snowflake cookie cutters. But you can use whatever Christmas cookie cutters you want!
Place the snowflake cookies 1-2 inches apart on your lined baking sheet. Place the baking sheet in the fridge or freezer for a minimum of 20 minutes before baking. This ensures the cookies keep their shape.


While the cookies are chilling, preheat your oven to 350°F.
Bake for 8-12 minutes or until the edges are set. Bake on the middle rack of the oven and rotate the pan halfway through baking for the best results.
Let the shortbread cookies cool on the baking sheet for 2-3 minutes, then remove and let them finish cooling on a cooling rack.

Tips for Perfect Cookies
Measure your flour correctly! It's most accurate to use a kitchen scale, but if you're measuring by volume you want to spoon and level! Fluff up the flour a bit with a spoon, and then spoon flour into the measuring cup. Once it's overflowing, use the back of a knife to level it off. Don't ever pack flour into the measuring cup or you'll end up with way too much! Improperly measured flour can lead to dry, crumbly cookies that don't spread.
Make sure your oven is the proper temperature! Use an oven thermometer to make sure your oven is exactly 350°F. If the oven is too cold, the cookies will spread too much and if it's too hot they centers won't bake all the way through. For example, my oven is about 20 degrees off. So I have to set the oven to 370°F in order to get it to bake at 350°F.
Use a lightweight, light colored baking sheet for best results! Believe it or not, a lighter pan makes the cookies bake more slowly than a dark pan, which helps keep them from spreading too much. My favorite pans for baking cookies are:
You also want to use either parchment paper or silicone mats on your cookie sheet to help keep the cookies from spreading.
Bake the cookies one sheet at a time, on the center rack. This will ensure all your cookies cook evenly and the bottoms don't burn. Then let the cookie sheet cool completely between batches. This ensures the cookies cook evenly and don't spread too much by being put on a hot pan.
Always under-bake the cookies! If you slightly under-bake the cookies (so the centers are still soft when you remove them from the oven), they'll stay soft and chewy for days!
Do the cookie scoot! In order to get perfectly round cookies, use a large cookie cutter to gently scoot them around as soon as they come out of the oven!

Decorating Snowflake Cookies
I am by no means an expert cookie decorator, so I like to keep things simple!
For these shortbread Christmas cookies I use my basic royal icing recipe and place it in a piping bag fitted with a small size 3 decorating tip! Then I use several simple lines to make the snowflakes and top with sanding sugar! They only take a few minutes and look great!
Simple Royal Icing
- 1 cup powdered sugar
- 2 teaspoons meringue powder
- 2-3 teaspoons water
Meringue powder is a super important component in royal icing! It helps keep the icing stable and makes it dry super quickly! It's honestly the best secret ingredient that I keep in my kitchen at all times! You can find it on amazon or craft stores for just a couple dollars and it lasts forever!
All you have to do is mix together the powdered sugar and meringue powder and add in water 1 teaspoon at a time until your desired consistency is reached. For these cookies I used icing that was pretty thick and would just barely fall of a spoon (think super thick honey).

Recipe FAQ's
Store in an airtight container at room temperature for up to a week.
Chilling the cookie dough allows the flour to hydrate a bit and ensures the butter is super cold. This keeps your cookies from spreading too much and completely flattening out. It also ensures the snowflake cookies keep their shape!
Yes! You can freeze either the dough or the baked cookies! To freeze the dough, wrap tightly and then place in a freezer safe bag for 2-3 months. Let thaw in the fridge overnight before using. Baked shortbread cookies can be stored in the freezer for up to 3 months (I like to freeze them before decorating).

Tips for Success!
For best results I always recommend using weight measurements (especially when baking) because it's the most accurate. Kitchen scales are super affordable and also reduce the number of dishes you have to do! However, all my recipes also include US customary measurements for convince. Use this chart to convert measurements for common ingredients!
Substitutions: In all my recipes, I've included substitutions that I know will work, but I cannot guarantee results if you substitute ingredients that I have not recommended. [For example, granulated sugar and honey are indeed both sweeteners but they have very different properties so they can not always be swapped 1:1. Using honey in a cookie recipe that calls for granulated sugar will yield a giant mess.] In the recipe card you'll find links to the specific ingredients/brands that I use.
A note on salt: I almost exclusively use Diamond Crystal Kosher Salt because it's the best all-purpose salt for cooking and baking. If you're not using kosher salt, consult this handy guide for a conversion chart! When in doubt, if you're using table salt just reduce the amount by half for baked goods. When cooking, I prefer to under-salt because you can always add more! If you've over-salted, adding a little bit of acid (like lemon juice) can help.
More Christmas Recipes You Might Like!
If you make this recipe, please leave a star rating at the bottom of the page! This provides helpful feedback to both me and other readers. And if you want more delicious, scratch-made recipes you can subscribe to my newsletter and follow along on Instagram, Pinterest, and Facebook!
Recipe Card

Christmas Shortbread Cutout Cookies
Special Equipment
Ingredients
Shortbread Cookies
- 1 cup unsalted butter, room temperature
- ¾ cup powdered sugar
- 1 teaspoon vanilla extract, or peppermint extract
- 1 ¾ cup all purpose flour
- ¼ cup almond flour, substitute all purpose flour
- ¼ teaspoon kosher salt
Simple Royal Icing
- 1 cup powdered sugar
- 2 teaspoons meringue powder, optional
- 1-3 tablespoons water
- sanding sugar
Instructions
Shortbread Cookies
- Using a stand mixer fitted with the paddle attachment, cream together the softened butter and powdered sugar until light and fluffy.
- Then add in the vanilla extract and mix until fully combined.
- Mix in the flour and salt until just combined. The dough should come together into a soft but not sticky ball.
- Divide in half and press the dough into discs. Wrap tightly in plastic wrap and refrigerate overnight (or a minimum of at least 2 hours).
- Line 2 baking sheets with parchment paper and set aside.
- On a lightly floured surface, roll out the dough to your desired thickness (I like between ¼ and ½ inch thick). Then cut out the cookies into your desired shapes.
- Place the snowflake cookies 1-2 inches apart on your lined baking sheet. Place the baking sheet in the fridge or freezer for a minimum of 20 minutes before baking. This ensures the cookies keep their shape.
- While the cookies are chilling, preheat your oven to 350°F.
- Bake for 8-12 minutes or until the edges are set. Bake on the middle rack of the oven and rotate the pan halfway through baking for the best results.
- Let the shortbread cookies cool on the baking sheet for 2-3 minutes, then remove and let them finish cooling on a cooling rack.
- Let the cookies cool completely before decorating.
Simple Royal Icing
- In a small bowl, mix together the powdered sugar meringue powder. Slowly drizzle in the water a little bit at a time until the icing flows slightly but still holds its shape. For these cookies I used icing that was pretty thick and would just barely fall of a spoon (think super thick honey).
- Transfer to a piping bag fitted with a small round tip and decorate the snowflake shortbread cookies as desired.
- Store cookies in an airtight container at room temperature for up to a week.
Notes
Nutrition
The nutritional information on this website is only an estimate and is provided for convenience and as a courtesy only. The accuracy of the nutritional information for any recipe on this site is not guaranteed.


Sarah says
Oh my goodness perfection! I made two batches. The first time followed the instructions to a T. The second time I rolled mine very thick, so it only yielded 10 cookies haha but adjusted the time to 16 mins appx and turned out fantastic. So buttery and delicious. Kept their shape and the icing was DIVINE! Saving this for future holidays - thank you!!
Gina says
As soon as I made this cookie dough I ate a pinch, I always eat my cookie dough, even if it has egg in it...
My mouth was so happy and my lips said WOW!
I immediately made another batch.
I couldn't believe the texture, so very creamy and melted in my mouth. And the taste was something I never imagined from a cookie dough.
I could not wait to try this cookie dough in its cookie form. So after refrigerating for a short time, I broke off a small piece, rolled it out and cut it just into squares with a pizza cutter so I could bake a sample.
Ohhhh myyyy
Super Delicious!
Such a flaky, crispy texture with such wonderful flavor. I used no icing, honestly they are so perfect just way they are that I did not miss the icing.
Fantastic, just perfect.
So I plan to make several of these cookies, at least 2 more batches to share this Christmas. Some will be iced and some will not. I'm going to find a lovely cutter that I can use to make these exquisite cookies that will look as pretty as it tastes with no decorating at all.
This recipe is wonderful, simple, few ingredients, no egg and super easy to make.
I would HIGHLY RECOMMEND this recipe to everyone, even those who have used their family cookie recipe forever. Just try this one time!
A tip, remember when adding the flour to mix until JUST COMBINED as the recipe says. I say this only because I have left my cookie dough mixing in the stand mixer for too long in the past and I know how that will just destroy any dough, making it impossible to roll.
Just follow this recipe as it is written. You can't go wrong. You will be so happy you tried this keeper.
ENJOY!!!