
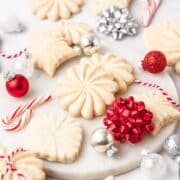
These brown butter stamp cookies are a simple, but delicious Christmas cookie! They're light, buttery and not overly sweet. Since they aren't too sweet, they're perfect with a big cup of coffee or hot chocolate!

You might also like these maple sandwich cookies or these brown butter sugar cookies!
Jump to:
Ingredient Notes
You just need a few simple ingredients to make these brown butter stamp cookies!

Almond Flour - I like substituting a portion of the all purpose flour with almond flour in all my cookies! It yields a more tender cookie with just that slight almond flavor. But you can leave it out if desired!
Egg - This helps bind the cookies and hold their shape.
Almond Extract - This is optional, but I love the extra flavor it adds!
Brown Butter - My favorite ingredient of all time is brown butter!! Brown butter is just unsalted butter that has been melted and gently cooked to bring out a toasty, nutty flavor. If you've never made brown butter before, you can check out this post with all my tips for how to make brown butter!
Browning the butter is [technically] optional but the extra time is SO worth it! The biggest problem I see people run into when using brown butter in cookies, is not letting the butter cool completely to room temperature before adding it to the dough.
Cookie Stamps - The stamps are completely optional, but are such a fun way to add cute patterns to the tops of the dough! These Nordic Ware cookie stamps are my favorite! But you can also just roll out the dough and use regular cookie cutters instead.
How to Make Stamp Cookies
Using a stand mixer fitted with the paddle attachment, cream together the room temp brown butter and powdered sugar until light and fluffy.
Then add in the egg, vanilla extract, and almond extract and mix until fully incorporated.


Fold in the flour, almond flour, and salt until just combined.
Press the dough into a disc and wrap tightly in plastic wrap. Refrigerate until firm (2 hours minimum but ideally overnight).


Line a baking sheet with parchment paper.
Portion the dough into balls that are about 2 tablespoons and generously flour the top of the dough balls as well as your cookie stamps.
Press the stamp straight down in the center of the ball of dough and gently lift up. Carefully peel away the excess dough from the sides (you can re-roll the scraps into more dough balls).


Place stamped cookies 1-2 inches apart on your baking sheet (they won’t spread much). Place the baking sheet in the freezer for a minimum of 20 minutes (or the fridge for 40 minutes) before baking to allow the cookies to firm back up. This ensures the cookies won't spread during baking.

While the cookies are chilling, preheat your oven to 350°F.
Bake for 9-11 minutes or until the edges are set and just starting to brown. Bake on the middle rack of the oven and rotate the pan halfway through baking for the best results.
Let the cookies cool on the baking sheet for 2-3 minutes, then remove and let them finish cooling on a cooling rack.

Optional Glaze
I love these stamp cookies as is! On their own, they're very light, buttery, and subtlety sweet. But with the glaze, they're much sweeter! Both options are delicious in their own way so I like to do half and half!
- ½ cup powdered sugar
- 1 tablespoon maple syrup
- 1-2 tablespoons milk (as needed)
To make the glaze, whisk together the powdered sugar and maple syrup in a small bowl, until smooth. Then stir in the milk a little bit a time until your desired consistency is reached.
Dip the tops of the cooled brown butter stamp cookies in the glaze and place back on the cooling rack. After about 20 minutes the glaze will harden.
Tips for Perfect Cookies
Measure your flour correctly! It's most accurate to use a kitchen scale, but if you're measuring by volume you want to spoon and level! Fluff up the flour a bit with a spoon, and then spoon flour into the measuring cup. Once it's overflowing, use the back of a knife to level it off. Don't ever pack flour into the measuring cup or you'll end up with way too much! Improperly measured flour can lead to dry, crumbly cookies that don't spread.
Make sure your oven is the proper temperature! Use an oven thermometer to make sure your oven is exactly 350°F. If the oven is too cold, the cookies will spread too much and if it's too hot they centers won't bake all the way through. For example, my oven is about 20 degrees off. So I have to set the oven to 370°F in order to get it to bake at 350°F.
Use a lightweight, light colored baking sheet for best results! Believe it or not, a lighter pan makes the cookies bake more slowly than a dark pan, which helps keep them from spreading too much. My favorite pans for baking cookies are:
You also want to use either parchment paper or silicone mats on your cookie sheet to help keep the cookies from spreading.
Bake the cookies one sheet at a time, on the center rack. This will ensure all your cookies cook evenly and the bottoms don't burn. Then let the cookie sheet cool completely between batches. This ensures the cookies cook evenly and don't spread too much by being put on a hot pan.
Always under-bake the cookies! If you slightly under-bake the cookies (so the centers are still soft when you remove them from the oven), they'll stay soft and chewy for days!
Do the cookie scoot! In order to get perfectly round cookies, use a large cookie cutter to gently scoot them around as soon as they come out of the oven!
Cookie Baking Tools

Recipe FAQ's
You can store these cookies in an airtight container in the fridge for up to 5 days.
Chilling the cookie dough allows the flour to hydrate a bit and ensures the butter is super cold. This keeps your cookies from spreading too much and completely flattening out. It also ensures the stamped pattern stays pressed on the top of the cookie.
Nope! You can regular unsalted butter if you prefer! I just love the way the brown butter adds a rich, nutty flavor.

Tips for Success!
For best results I always recommend using weight measurements (especially when baking) because it's the most accurate. Kitchen scales are super affordable and also reduce the number of dishes you have to do! However, all my recipes also include US customary measurements for convince. Use this chart to convert measurements for common ingredients!
Substitutions: In all my recipes, I've included substitutions that I know will work, but I cannot guarantee results if you substitute ingredients that I have not recommended. [For example, granulated sugar and honey are indeed both sweeteners but they have very different properties so they can not always be swapped 1:1. Using honey in a cookie recipe that calls for granulated sugar will yield a giant mess.] In the recipe card you'll find links to the specific ingredients/brands that I use.
A note on salt: I almost exclusively use Diamond Crystal Kosher Salt because it's the best all-purpose salt for cooking and baking. If you're not using kosher salt, consult this handy guide for a conversion chart! When in doubt, if you're using table salt just reduce the amount by half for baked goods. When cooking, I prefer to under-salt because you can always add more! If you've over-salted, adding a little bit of acid (like lemon juice) can help.
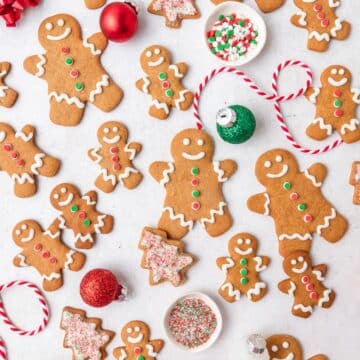
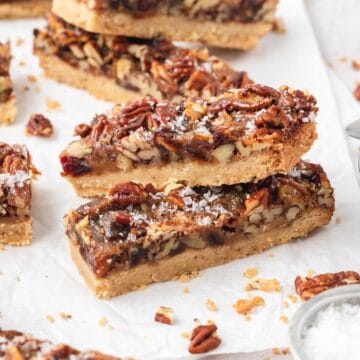
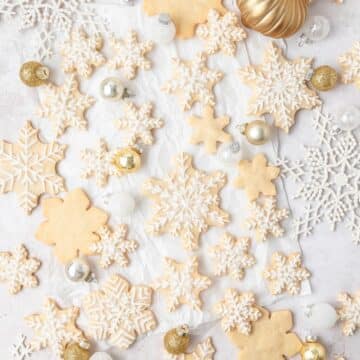
More Christmas Cookie Recipes!

If you love this recipe, please leave a star rating at the bottom of the page! This provides helpful feedback to both me and other readers.
Also be sure to add us as a trusted site on Google so that our recipes show up more in your searches!
For more delicious, scratch-made recipes you can subscribe to my newsletter and follow along on social media!
Recipe Card
Brown Butter Stamp Cookies
Ingredients
Stamp Cookies
- ¾ cup unsalted brown butter, room temperature
- 1 cup powdered sugar
- 1 large egg, room temperature
- ½ teaspoon vanilla extract
- ½ teaspoon almond extract
- 2 cups all purpose flour
- ¼ cup almond flour
- ¼ teaspoon kosher salt
Optional Glaze
- ½ cup powdered sugar
- 1 tablespoon maple syrup
- 1-2 tablespoons milk, as needed
Instructions
Stamp Cookies
- Using a stand mixer fitted with the paddle attachment, cream together the room temp brown butter and powdered sugar until light and fluffy.
- Then add in the egg, vanilla extract, and almond extract and mix until fully incorporated.
- Fold in the flour, almond flour, and salt until just combined.
- Press the dough into a disc and wrap tightly in plastic wrap. Refrigerate until firm (2 hours minimum but ideally overnight).
- Line a baking sheet with parchment paper.
- Portion the dough into balls that are about 2 tablespoons and generously flour the top of the dough balls as well as your cookie stamps.
- Press the stamp straight down in the center of the ball of dough and gently lift up. Carefully peel away the excess dough from the sides (you can re-roll the scraps into more dough balls).
- Place stamped cookies 1-2 inches apart on your baking sheet (they won’t spread much). Place the baking sheet in the freezer for a minimum of 20 minutes (or the fridge for 40 minutes) before baking to allow the cookies to firm back up. This ensures the cookies won't spread during baking.
- While the cookies are chilling, preheat your oven to 350°F.
- Bake for 9-11 minutes or until the edges are set and just starting to brown. Bake on the middle rack of the oven and rotate the pan halfway through baking for the best results.
- Let the cookies cool on the baking sheet for 2-3 minutes, then remove and let them finish cooling on a cooling rack.
Optional Glaze
- I love these cookies as is! On their own, they're very light, buttery, and subtlety sweet. But with the glaze, they're much sweeter! Both options are delicious in their own way so I like to do half and half!
- To make the glaze, whisk together the powdered sugar and maple syrup in a small bowl, until smooth. Then stir in the milk a little bit a time until your desired consistency is reached.
- Dip the tops of the cooled cookies in the glaze and place back on the cooling rack. After about 20 minutes the glaze will harden.
Notes
Nutrition
The nutritional information on this website is only an estimate and is provided for convenience and as a courtesy only. The accuracy of the nutritional information for any recipe on this site is not guaranteed.

Laura says
I just made these cookies, and the flavor is just amazing! They are SO, SOOO GOOD!!! However, I do have a question. I had a hard time handling the dough, it was dry—crumbly and it didn’t really keep together. Even the raw cookies looked a little cracked before baking. What could be the reason? I used the metric system measurements for ingredients and followed the instructions as the recipe indicates. I would love to troubleshoot this because they are just so delicious, but it did take very long to stamp them and they also didn’t keep their shape very well (the stamped designs are barely visible after baking). Thanks in advance!!!
Kyleigh Sage says
Since the only actual liquid in these cookies is the egg, that's probably it! A large egg should be about 57g but every egg is different so if your eggs are a little smaller you could end up with not enough liquid to keep the dough together. If it seems too dry next time, you can add in a tiny bit of water (just 1 teaspoon at a time) until it comes together better and that will help! It's a relatively dry dough so you want to be careful not to add too much (otherwise it'll be too sticky and will stick to the stamp), but it should come together without crumbling!