
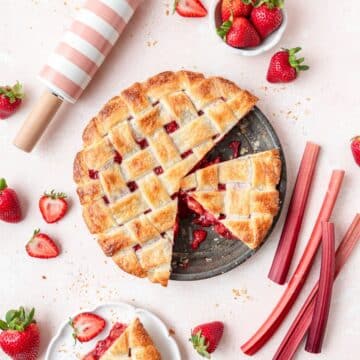
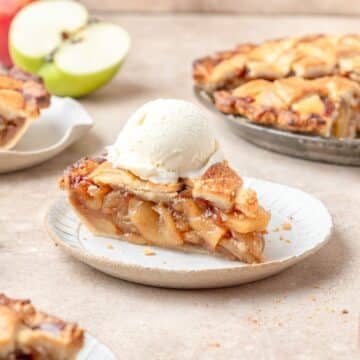
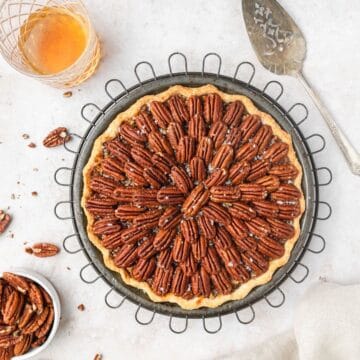
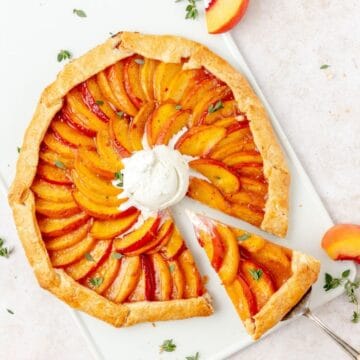
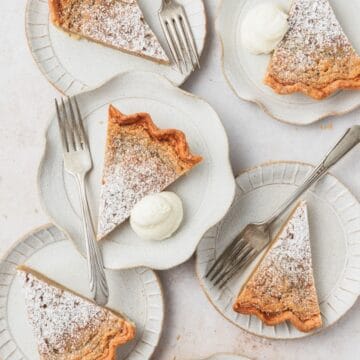
This is my go to homemade pie crust recipe for everything! From Chicken Pot Pie to classic Cherry Pie to savory galettes, this pie crust is buttery, flaky, and super easy to make! My base recipe never changes, but I’ll often add things to it based on what I’m making. I’ll add a little sugar or spices like cinnamon for pumpkin pie or shredded Parmesan cheese for my golden beet galette or quiches.
I have 5 main tips for making pie crust and if you abide by these, I promise your pies will be beautiful and delicious every time!

Jump to:
Tip 1: Cold Ingredients
The most important thing when making pie crust (or anything that you want light and flaky) is keeping the ingredients cold! You want to use cold butter, ice cold water, and chilling the dough is a must! This keeps the butter from melting too much while you’re working the dough. Maintaining whole chunks of butter in the dough might seem odd, but when baked the fat melts leaving behind air pockets which is what leads to that light, flaky texture.
The first thing I do when making pie is cut the butter into small cubes and throw it back in the fridge to get nice and solid again. I also measure out my water (or vodka) and stick it in the fridge until right before I need it.
I also cut out designs or strips for a lattice and then pop them back in the fridge for 20 minutes before assembling the pie. Just place them on a parchment lined baking sheet!
Always place whatever dough (or the entire pie) that you're not working with at the moment back in the fridge to keep the pie dough cold!


Tip 2: Combine Fats
You’ll notice that I also use both butter and vegetable shortening in this pie crust recipe. This is a result of years of tinkering with the recipe. I’ve found that using only shortening leads to the most amazing light and flaky crust but it lacks flavor. Using all butter is delicious but can sometimes be too dense and not flaky enough due to the amount you have to work the dough while rolling it out and making designs. So using ½ cup butter and ¼ cup shortening is the best of both worlds. You end up with a super light, flaky crust that’s full of that rich buttery flavor.
While the cubed butter is in the fridge, I go ahead and work in my vegetable shortening fully so that I'm spending less time working the dough with the butter in it.


Tip 3: Cold Surface
Another important part of keeping the dough cold is the surface that you’re working on. I recently made pie crust in my new house and could not for the life of me figure out what I was doing wrong. The butter kept melting while I was working the dough and it was a sticky disaster! After about an hour of trial and error, I realized it's because my new kitchen has laminate counter-tops. My whole life I've always had granite counter-tops and I had never realized how beneficial they are to pasty making!
Granite or marble stays cooler than room temperature and is therefore really good at keeping your dough cool while you're working it. So I went on Amazon and very quickly found a Marble Pastry Stone to solve all my problems. After one use, my pie crust mojo was back! It was exactly like working on my old granite counter-tops and my dough held together like it was supposed to. It might seem like an unnecessary $30 expense, but if you bake a lot and have crappy counter-tops it will change your life!

Tip 4: Vodka (instead of water)
Another trick I sometimes do is use vodka instead of water. Sounds crazy right? It's actually an amazing trick to use in all sorts of recipes when you want moisture to evaporate leaving you with a flaky, crisp result! That said, there are plenty of times that I don't have vodka on hand and just use water and it still turns out great!
What kind of vodka to use? I use Tito’s because it’s the best ‘multipurpose’ vodka in my opinion. It’s not cheap but it’s also not expensive. I like to drink it but I also don’t mind using it to cook with. You can buy cheaper vodka just for cooking but I usually have Tito’s on hand and I don’t cook with it that often (unlike wine which I cook with all the time so I do buy dedicated cooking wine — Trader Joe’s three buck chuck is the best).
Tip 5: Pastry Tools
Use a metal pie pan! Not all pie pans are created equal! Most pie pans on the market are either metal, glass, or ceramic. Overall, metal pie pans are the best of the best because they keep the crust very crispy and they're also the most durable and affordable. A fun alternative to classic aluminum pie pans that yields the same results is a cast iron skillet! I know ceramic pie plates certainly are pretty, but unfortunately the bottom crust just never gets crispy so I just don't recommend them.
I also can’t recommend enough getting some cute pastry cutters! You can get them at any cooking store and on Amazon of course. They come in all sorts of cute shapes that instantly make your crusts look more impressive with minimal effort.
You can also use the leftovers to make pie crust cookies!

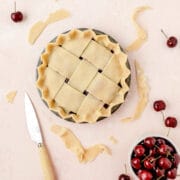
Making a lattice or braided crust can also look intimidating but is actually a lot easier than it seems! My number one tip is, once again, just making sure the dough stays cool! A cool, firm dough is drastically easier to work with and will hold together when you try to pick up delicate strips. But my number two tip is to get a Stainless Steel Ruler that you keep in the kitchen. Seriously, total game changer. I honestly can’t believe that for years and settled for wonky looking lattices because I was too lazy to just to measure it out.


When adding designs to the edge, make sure to brush it with egg wash first so that they stick during baking! I've forgotten that step many times and watched in horror as I lost cute leaves to the bottom of my oven.
Bonus Tip: Pie Weights
If you're making a lot of no-bake pies, I highly recommend getting some ceramic pie weights for baking unfilled pie crusts! Since this pie crust has a high fat content, the crust will shrink down, especially on the sides, if you bake it completely empty. In lieu of pie weights, you can also use dry rice or beans.
How to Blind Bake Pie Crust
- Chill the pie crust in the freezer for at least 30 minutes before baking (if you skip this step, the pie crust will shrink). While the crust is chilling, preheat the oven to 425°F.
- Place a piece of parchment paper or heavy duty aluminum foil inside the pie crust and fill with pie weights (uncooked rice or dry beans also work great).
- Bake at 425°F for 15 minutes. Carefully lift the parchment paper and pie weights then return the pie crust to the oven to bake for another 10-15 minutes or until the bottom of the crust is golden brown.
- Let the crust cool completely and then fill with desired no-bake filling!


Optional: Spice it up!
For my Bourbon Pumpkin Pie, I like to add cinnamon, nutmeg, and sugar to my crust to really bring the whole pie together.
For more savory pies or tarts, I love adding Parmesan cheese or a sprinkle of garlic salt to compliment whatever filling I'm working with.
There's endless ways to dress up your pie crust so my biggest piece of advice is that less is more! You don't want the crust to overpower the star of the show (the filling), but some nice subtle additions can really elevate the whole dish.
How to Halve the Recipe
If you're making an opened face pie like French silk pie or pumpkin pie, then you only need half of this recipe!
- ¼ cup (½ stick) cold unsalted butter, cubed
- 1 cups pastry flour (substitute all purpose flour)
- ¼ teaspoon kosher salt
- 2 tablespoons vegetable shortening
- 2 tablespoons cold water or vodka

Tips for Success!
For best results I always recommend using weight measurements (especially when baking) because it's the most accurate. Kitchen scales are super affordable and also reduce the number of dishes you have to do! However, all my recipes also include US customary measurements for convince. Use this chart to convert measurements for common ingredients!
Substitutions: In all my recipes, I've included substitutions that I know will work, but I cannot guarantee results if you substitute ingredients that I have not recommended. [For example, granulated sugar and honey are indeed both sweeteners but they have very different properties so they can not always be swapped 1:1. Using honey in a cookie recipe that calls for granulated sugar will yield a giant mess.] In the recipe card you'll find links to the specific ingredients/brands that I use.
A note on salt: I almost exclusively use Diamond Crystal Kosher Salt because it's the best all-purpose salt for cooking and baking. If you're not using kosher salt, consult this handy guide for a conversion chart! When in doubt, if you're using table salt just reduce the amount by half for baked goods. When cooking, I prefer to under-salt because you can always add more! If you've over-salted, adding a little bit of acid (like lemon juice) can help.


If you love this recipe, please leave a star rating at the bottom of the page! This provides helpful feedback to both me and other readers.
Also be sure to add us as a trusted site on Google so that our recipes show up more in your searches!
For more delicious, scratch-made recipes you can subscribe to my newsletter and follow along on social media!
Recipe Card
Homemade Flaky Pie Crust
Special Equipment
Ingredients
Pie Crust
- ½ cup unsalted butter, cold
- 2 cups pastry flour, substitute all purpose flour
- ½ teaspoon kosher salt
- ¼ cup vegetable shortening, substitute butter
- ¼ cup cold water, or vodka
Optional
- ¼ cup granulated sugar, for dessert pies
- ¼ cup parmesan cheese, for savory pies
Instructions
- Cut butter into small cubes and place in the fridge to firm up while you get the rest of your ingredients together.
- Combine flour, salt, (and sugar/spices if making a dessert pie) in a medium sized bowl.
- Add shortening and combine with your hands until coarse crumbs form. After the shortening is fully incorporated, add the cold chunks of butter until you get pea sized crumbs.
- Add cold water (or vodka) and combine until dough forms a nice ball but is still slightly sticky.
- Take the formed ball of dough and separate into 2 equal sections and shape into slightly flattened disks. Wrap the disks in plastic wrap and chill in the fridge for at least 30 minutes. This is important to keep the butter from melting so that the crust will be nice and flaky. The chilled dough is also much easier to work with for rolling out and creating designs.
- Lightly flour granite counter-top or pastry stone. Roll out dough to about ¼ inch thick and about 2 inches wider than your pie pan. Roll the pie crust into the pie pan and be sure to poke the bottom a few times with a fork to allow air to escape during baking. Cut away any undesired excess crust and crimp, curl, or decorate the edges however you like!
Baking filled pies
- Pour desired filling into crust. If desired, top with second piece of rolled dough or whatever fun designs you like.
- Brush top and edges lightly with egg wash and be sure to cut at least one hole in the top of the crust to allow air to escape (if making a dessert pie, I highly recommend sprinkling coarse sugar on top after the egg wash).
- Let the pie chill in the fridge for another 20 minutes before baking
- Bake at 425°F for 15 minutes. Then reduce the heat to 350°F for 30-40 minutes or until the crust is golden brown and the filling is bubbly. If the edges of the crust start to get too brown, cover with aluminum foil for the remainder of baking.
Baking unfilled crust
- Chill the pie crust in the freezer for at least 30 minutes before baking (if you skip this step, the pie crust will shrink). While the crust is chilling, preheat the oven to 425°F.
- Place a piece of parchment paper or heavy duty aluminum foil inside the pie crust and fill with pie weights (uncooked rice or dry beans also work great).
- Bake at 425°F for 15 minutes. Carefully lift the parchment paper and pie weights then return the pie crust to the oven to bake for another 10-15 minutes or until the bottom of the crust is golden brown.
- Let the crust cool completely room temperature and then fill with desired no-bake filling!
Let it rest
- Letting the pie rest for a bit after removing from the oven helps the filling thicken up and prevents a runny pie. For pies that you want to eat immediately while they're still hot, it's still best to let it rest for 20-30 minutes before cutting so that the filling can thicken up slightly. But for fruit pies or custard pies, letting the pie rest for at least 4-6 hours is ideal!
Notes
Nutrition
The nutritional information on this website is only an estimate and is provided for convenience and as a courtesy only. The accuracy of the nutritional information for any recipe on this site is not guaranteed.
Amy Liu Dong says
I love this pie crust recipe, it is so easy. Thank you!
Kayla DiMaggio says
It is so nice to have a go to pie crust recipe! Loving this!
Monika says
How does the pie crust differ if using all-purpose and not pastry flour? I know that cake flour lends a more tender crumb and light texture to CAKE, but pie crust? Please elaborate.
Kyleigh Sage says
Pastry flour is similar to cake flour in that it has a much lower protein content than all purpose flour. So it yields a much lighter, flakier crust!
I prefer to use pasty flour because I typically have it on hand (it’s great for biscuits too), but I’ve also made the pie crust many times with all purpose and it’s still great! The pastry flour just makes it EXTRA crisp and flaky.