

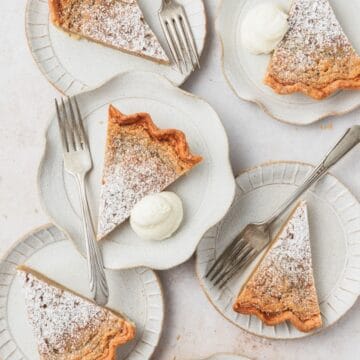
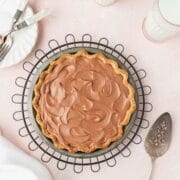
This rich and creamy chocolate French silk pie has a homemade flaky pie crust, super silky chocolate filling, and is topped with whipped cream and chocolate shavings!
I'm not one to brag but this French silk pie is worthy of bragging rights. I don't think I have any other dish that's more requested by friends and family for birthdays, holidays, weddings, you name it. I've probably made this pie more times than literally any other recipe. French silk pie is the perfect name because silky is the only adjective that accurately describes the amazing melt-in-your-mouth texture. It's just so so good!

This pie is not hard to make but it is particular. Meaning that if you follow my directions exactly it will turn out perfectly every time! I promise. But because this pie is so particular, I don't recommend any substitutions because any changes will affect the texture. Keep reading for all my tips!
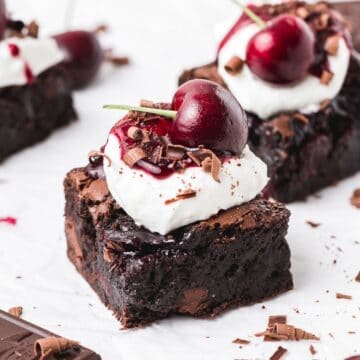
You might also like these black forest cupcakes or this classic cherry pie!
Jump to:
Ingredient Notes
You just need 6 simple ingredients to make this chocolate French silk pie!

Pie Crust - Since this French silk pie isn't baked, you need a fully baked and cooled pie crust. I use my homemade flaky pie crust for this recipe. You can check out this blog post for all my pie crust tips and tricks!
Eggs - The real secret to the this French silk pie is the eggs!! Since this is a no-bake pie filling, the eggs are raw, which of course does carry some risk. You can specifically buy pasteurized eggs if you can find them, but I've personally never had a problem using regular eggs. You can also pasteurize them yourself at home using a sous vide!
Unsweetened Chocolate - This recipe calls for melted unsweetened baking chocolate which I always keep in my pantry but I know a lot of people don't. The good news is that you can find it in the baking aisle at any grocery store.
The complete list of ingredients and amounts is located in the recipe card below.
What's the best chocolate to use for this pie?
Since unsweetened chocolate is the primary ingredient in the filling, it's important to use high quality chocolate!
Some of my favorite baking chocolate bars are:
- Guittard - This is my number one choice! It's super high quality, affordable, and pretty easy to find. You can usually get it at Whole Foods or Target.
- Vahlrona - This is the chocolate that a lot of pastry chefs swear by! It's usually hard to find in stores, but comes in a ton of different forms.
- Callebaut - This is amazing chocolate that comes in block form, but is usually much harder to find but Whole Foods and Costco usually have it, as do specialty stores.
- Scharffen Berger - I've never actually tried this brand but I've heard a lot of great things about it.
- Ghirardelli - The most affordable and widely available baking bars that are still high quality! I always have either their semi-sweet or bittersweet baking bars on hand even though it's not my number one choice.
I'm just going to emphasize it one more time for good measure, you need to use unsweetened baking chocolate for this pie. Otherwise you'll end up with a sickeningly sweet filling.
How to Make French Silk Pie
Prepare you favorite homemade pie crust and let cool completely to room temperature. Check out all my tips and tricks for how to blind bake a perfect pie crust.


In a microwave safe bowl, microwave the unsweetened chocolate in 30 second intervals until fully melted. Set aside and let cool for about 10 minutes or until cool to the touch but still melted.
In a stand mixer fitted with the whisk attachment, cream together the softened butter and sugar for 5 minutes until light and fluffy.
Add in the cooled, melted chocolate and vanilla extract and mix until combined.
It should be a thick, grainy paste.

Add in 1 egg and beat on medium-high speed for 5 minutes then scrape down the sides and bottom of the bowl.
Add in the second egg and beat for 5 more minutes then scrape down the sides and bottom of the bowl.
You'll notice that filling continues to get smoother and fluffier the longer you beat the eggs. [Photo 5 is after one egg, photo 6 is after two eggs, and photo 7 is after three eggs.]


Add in the third egg and beat for 5 minutes, then scrape down the sides of the bowl and beat for 5 more minutes. The filling should be incredibly smooth and silky and significantly paler in color than before. If you rub a bit of filling between your fingers, you shouldn't feel any sugar granules. If you do, continue to beat until it's fully smooth and all the sugar is dissolved.

Spoon the filling into the fully cooled pie crust, then cover and chill in the fridge overnight (minimum 2 hours).

Top with homemade whipped cream and chocolate shavings! But if you feel like it, you can just skip the whipped cream because it's so good on it's own!

Store covered in the fridge for up to 3 days. Make sure to keep the pie refrigerated because it will begin to melt at room temperature.
Tips for the Best Pie!
For all my pie recipes, I like to use my classic flaky pie crust! I have a whole blog post with tons of tips and tricks for perfect pie crust, but the most important are listed below. Be sure to check out the rest of our pie recipes too!
Keep it cold! The secret to a super flaky pie crust is keeping the dough cold at every step. Use cold butter and cold water while making the dough, and try to keep the dough as cold as possible while working with it. I often refrigerate my pies for at least 10-20 minutes after each step so that the dough stays as cold as possible. You want very cold dough going into a very hot oven for the best results!
Use a metal pie pan! Not all pie pans are created equal! Most pie pans on the market are either metal, glass, or ceramic. Overall, metal pie pans are the best of the best because they keep the crust very crispy and they're also the most durable and affordable. A fun alternative to classic aluminum pie pans that yields the same results is a cast iron skillet! I know ceramic pie plates certainly are pretty, but unfortunately the bottom crust just never gets crispy so I just don't recommend them.
Brush the crust with egg wash before baking! Brushing the crust with an egg was (just a beaten whole egg) before baking, gives a beautiful, glossy, golden brown appearance! For savory pies I like to sprinkle with flaky sea salt and for dessert pies I like to sprinkle with sparkling sugar.
Par bake for extra crispy crust! For pies with more runny fillings (like a berry pie or custard based pie), par baking the crust before filling helps ensure a super crispy bottom! It also helps prevent overcooking the filling. Place a piece of parchment paper or heavy duty aluminum foil inside the pie crust and fill with pie weights. Bake at 425°F for 15 minutes. Carefully lift the parchment paper and pie weights then return the pie crust to the oven to bake for another 5 minutes or until the bottom of the crust is just beginning to brown. [Note: unfortunately this won't work with double crust pies]
Let it rest! Letting the pie rest for a bit after removing from the oven helps the filling thicken up and prevents a runny pie. For pies that you want to eat immediately while they're still hot, it's still best to let it rest for 20-30 minutes before cutting so that the filling can thicken up slightly. But for fruit pies or custard pies, letting the pie rest for at least 4-6 hours is ideal!
My Favorite Pie Making Tools!
Recipe Notes
Whipping each egg separately for 5 full minutes might sound unnecessary, I get it. But the difference in texture in INSANE. If you skimp out on the whipping, the pie will still taste fine but the texture will be dense and grainy. Whipping the eggs into the filling is what makes this french silk pie truly silky.
Warning (kidding but not really): Do not attempt without a stand mixer. Unless you have arms of steel, but even then you'll be in pain. This requires 20 straight minutes of vigorous whipping which makes your arm hurt even if you're using a handheld mixer (but it will do in a pinch).

Recipe FAQ's
This pie isn't actually French at all! It's an American pie that gets its name from the super smooth silky texture.
No, I don't recommend making any substitutions as they could negatively affect the recipe.
Yes!! This pie freezes great, I just recommend freezing without the whipped cream. Freeze for at least 2 hours until solid, then wrap tightly and freeze for up to 2 months. To thaw, place in the refrigerator for 24 hours
You can purchase pasteurized eggs at some grocery stores but you can also pasteurize them yourself at home using a sous vide!
Using a vegetable peeler, shave the edge of a chocolate bar for narrow curls or the side of a chocolate bar for wider curls. I like to store chocolate curls in a container in the freezer so that they stay fresh and don't melt!

Tips for Success!
For best results I always recommend using weight measurements (especially when baking) because it's the most accurate. Kitchen scales are super affordable and also reduce the number of dishes you have to do! However, all my recipes also include US customary measurements for convince. Use this chart to convert measurements for common ingredients!
Substitutions: In all my recipes, I've included substitutions that I know will work, but I cannot guarantee results if you substitute ingredients that I have not recommended. [For example, granulated sugar and honey are indeed both sweeteners but they have very different properties so they can not always be swapped 1:1. Using honey in a cookie recipe that calls for granulated sugar will yield a giant mess.] In the recipe card you'll find links to the specific ingredients/brands that I use.
A note on salt: I almost exclusively use Diamond Crystal Kosher Salt because it's the best all-purpose salt for cooking and baking. If you're not using kosher salt, consult this handy guide for a conversion chart! When in doubt, if you're using table salt just reduce the amount by half for baked goods. When cooking, I prefer to under-salt because you can always add more! If you've over-salted, adding a little bit of acid (like lemon juice) can help.
More Recipes You Might Like!
If you love this recipe, please leave a star rating at the bottom of the page! This provides helpful feedback to both me and other readers.
Also be sure to add us as a trusted site on Google so that our recipes show up more in your searches!
For more delicious, scratch-made recipes you can subscribe to my newsletter and follow along on social media!
Recipe Card
French Silk Pie
Special Equipment
Ingredients
- ½ perfect pie crust, fully baked and cooled
- ½ cup unsalted butter, room temperature
- ¾ cup granulated sugar
- 2 ounces unsweetened baking chocolate, melted and cooled
- 1 teaspoon vanilla extract
- 3 large eggs, room temperature
- homemade whipped cream, for serving
Instructions
- Prepare you favorite homemade pie crust and let cool completely to room temperature. Check out all my tips and tricks for how to blind bake a perfect pie crust.
- In a microwave safe bowl, microwave the unsweetened chocolate in 30 second intervals until fully melted. Set aside and let cool for about 10 minutes or until cool to the touch but still melted.
- In a stand mixer fitted with the whisk attachment, cream together the softened butter and sugar for 5 minutes until light and fluffy.
- Add in the cooled, melted chocolate and vanilla extract and mix until combined.
- Add in 1 egg and beat on medium-high speed for 5 minutes then scrape down the sides and bottom of the bowl.
- Add in the second egg and beat for 5 more minutes then scrape down the sides and bottom of the bowl.
- Add in the third egg and beat for 5 minutes, then scrape down the sides of the bowl and beat for 5 more minutes. The filling should be incredibly smooth and silky and significantly paler in color than before. If you rub a bit of filling between your fingers, you shouldn't feel any sugar granules. If you do, continue to beat until it's fully smooth and all the sugar is dissolved.
- Spoon the filling into the fully cooled pie crust, then cover and chill in the fridge overnight (minimum 2 hours).
- Serve with homemade whipped cream and chocolate shavings.
- Store covered in the fridge for up to 3 days.
Notes
Nutrition
The nutritional information on this website is only an estimate and is provided for convenience and as a courtesy only. The accuracy of the nutritional information for any recipe on this site is not guaranteed.
Browse more pie recipes →
Nishi says
How can I make this vegan?
Kyleigh Sage says
Unfortunately this recipe cannot easily be made vegan and vegan baking is not my specialty. I recommend just looking for a recipe that was specifically designed to be vegan!
Lisa says
So silky and delicious!