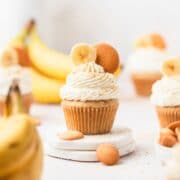
These banana pudding cupcakes have a light, banana cupcake base filled with creamy vanilla pudding, then topped with stabilized whipped cream and nilla wafers! They're the perfect southern summer dessert!

Banana pudding is a southern classic! You'd be hard pressed to find a summer potluck that doesn't have a giant dish of banana pudding on the table. So I wanted to recreate that classic childhood flavor in cupcake form!
Since everything is homemade, there are quite a few steps to make these banana pudding cupcakes. However, each step is pretty simple! I recommend making the pudding the night before you make the cupcakes so that it has time to fully chill and saves you a step the next day!
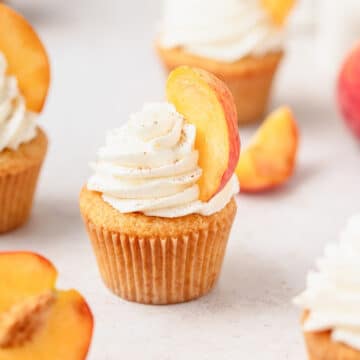
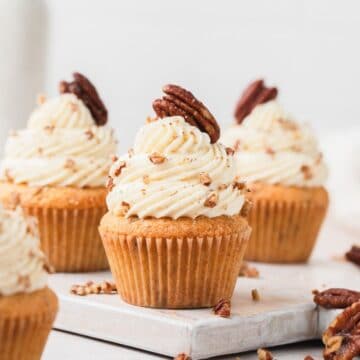
If you want more southern flavors, you might also like these banana pudding cups, butter pecan cupcakes, or these peaches and cream cupcakes!
Jump to:
Ingredient Notes
These banana pudding cupcakes are made completely from scratch! Meaning you get much richer flavor than you would with box mixes and cool whip (no offense if that's what you love, but I prefer the real deal).


Cake Flour - I always use cake flour in my cupcakes because it makes them super soft and tender, but all purpose flour also works great!
Butter - Regular unsalted butter works fine in these cupcakes, but for some extra flavor I always recommend brown butter!! Brown butter is just unsalted butter that has been melted and gently cooked to bring out a toasty, nutty flavor. If you've never made brown butter before, you can check out this post with all my tips for how to make brown butter!
Vanilla Bean Paste - I prefer to use vanilla bean paste in my pudding recipes because it has a much stronger, richer flavor! However, you can easily substitute pure vanilla extract.
Cornstarch - This is what helps thicken the vanilla pudding!
Egg Yolks - Using just yolks adds a super rich flavor the pudding! I also love using yolks because I always have leftovers from making macarons.
Bananas - For the cupcake base, a super ripe brown banana is best! But for the pudding/topping, firmer more yellow bananas are preferred.
Banana Extract - This is optional, but ½ teaspoon of banana extract in the pudding adds some extra banana flavor!
Nilla Wafers - You can't have banana pudding without nilla wafers! I add crushed nilla wafers to the cupcake base to help add more of that classic flavor!
Whipped Cream - It's not banana pudding without homemade whipped cream! To make the whipped cream more stable, I like to add powdered gelatin to it but that's optional. You could also do toasted swiss meringue if you're feeling fancy!
The complete list of ingredients and amounts is located in the recipe card below.
How to Make Banana Pudding
Scald the milk in a large pot on the stove top over medium heat (or in the microwave), until it is almost boiling.
In a large sauce pan, combine the cornstarch, sugar, and salt.
Over medium-low heat, slowly add in the milk about ½ cup at a time while whisking constantly.
As the filling begins to thicken, add in another ½ cup of milk and continue whisking.

Once all of the milk is added and the filling has thickened (enough the coat the back of a spoon), remove the pot from the heat.
Pour about ½ cup of the filling into a glass measuring cup and then slowly drizzle it into the beaten egg yolks, whisking constantly until fully combined and smooth.


Pour the egg mixture back into the pot with the rest of the filling cook for an additional 2-3 minutes or until the filling has thickened to a pudding consistency.
Stir in the butter and vanilla extract (and banana extract if using) until smooth.
Pour the pudding through a fine mesh strainer to remove any lumps.
Transfer to a bowl and cover with plastic wrap (place the plastic wrap directly on the surface of the vanilla pudding so a film doesn't form). Chill for at least 1 hour! Store in the fridge for up to a week.


If desired, chop a banana into small chunks and gently stir into the pudding before filling the cupcakes for more banana flavor!
Pudding Notes
The most important step in making the pudding is tempering the eggs. I know that sounds scary, but I promise it's not that hard! Tempering just means that you'll slowly add a small amount of hot liquid to the beaten eggs so that the temperature rises slowly and they don't scramble (trust me, you don't want scrambled eggs in your custard!
Once the filling mixture is scalding hot, you'll remove about ½ cup and place it into a glass measuring cup (the best for pouring hot liquid) and then slowly drizzle the syrup into the beaten eggs while whisking. Then you'll add the warm egg mixture back into the rest of the pudding. Easy peasy!
How to Make Banana Cupcakes
Preheat the oven to 350°F and line a 12 cup cupcake pan with cupcake liners
Pulse the nilla wafers in a food processor until you have a little more than ¼ cup of crumbs.


Whisk the cake flour, baking powder, nilla wafer crumbs, and salt together in a small bowl.
In a separate bowl, whisk the melted butter, sugar, brown sugar together until fully combined.
Then whisk in the egg, mashed banana, and vanilla together until combined.
Stir in about half of the flour mixture. Then stir in the milk and the rest of the flour mixture and mix until fully combined.


Pour about ¼ cup of batter into each cupcake liner (they should be about halfway full). Bake at 350°F for 18-22 minutes or until a cake tester comes out clean.


Remove from pan and let cool on wire rack. Let the cupcakes cool completely before decorating.
Use a cupcake corer to remove the center of each cupcake, then fill with about 2 teaspoons of chilled banana pudding.


How to Make Stabilized Whipped Cream
You can use just regular whipped cream if you don't have gelatin lying around, but for piping I always prefer to stabilize the whipped cream so that it stays nice and pretty (aka doesn't start melting down the side of your banana pudding cupcakes after 12 hours).
You can also check out this blog post for all of my other tips for making good whipped cream!
- Add the water to a microwave safe bowl and sprinkle the unflavored gelatin on top. Allow to sit for a few minutes.
- Transfer the gelatin mixture to the microwave and microwave for 5-10 seconds, until the gelatin is fully dissolved. Stir the mixture, then set aside to cool.
- In the bowl of a stand mixer fitted with the whisk attachment, or in a large mixing bowl using an electric mixer, combine the heavy whipping cream and powdered sugar. Whip the mixture until it starts to thicken and soft peaks form, then turn the mixer to low speed.
- Slowly pour in the gelatin mixture until well combined. Increase the mixer to medium speed and continue mixing until stiff peaks form.

Tips for the Best Baked Goods
Use room temperature ingredients! Always make sure ingredients like butter, eggs, milk, yogurt, etc. are at room temperature before baking (unless the recipe indicates otherwise)! This ensures they'll incorporate into the batter more easily and leads to overall better texture. Remove all ingredients from the fridge 30 minutes to an hour before baking for best results.
Measure your flour correctly! It's most accurate to use a kitchen scale, but if you're measuring by volume you want to spoon and level! Fluff up the flour a bit with a spoon, and then spoon flour into the measuring cup. Once it's overflowing, use the back of a knife to level it off. Don't ever pack flour into the measuring cup or you'll end up with way too much! Improperly measured flour can lead to dry, dense baked goods. [Measure cocoa powder the same way!]
Use an oven thermometer! Just because your oven says it's 350, doesn't mean it is! If you oven hasn't been calibrated recently, it can be as much as 30 degrees off, which will negatively affect all baked goods from cakes to macarons! An oven thermometer is the easiest/cheapest way to ensure your oven is always at the proper temperature.
Make sure you baking powder is fresh! Baking powder is important for helping baked goods rise properly, but it has a relatively short shelf life once opened, so it's one of the few items I never buy in bulk! To test if your baking powder is still fresh, add a small amount to boiling water. If it bubbles it's still good to use, but if not it's time to toss it!
Cupcake Decorating Tips
Make sure you let the cupcakes cool completely before frosting!!
Use a cupcake corer to easily remove the center of your cupcakes before filling with banana pudding.
For these big beautiful whipped cream swirls on these banana pudding cupcakes, I use the 9FT tip from this decorating kit. The tips are much larger than standard sizes and so fun for decorating cupcakes!
If you're feeling fancy and want to use up some leftover egg whites, you could also do toasted Swiss meringue on top! Just use the meringue recipe from my s'mores cupcakes!
Garnish the cupcakes with sliced bananas, nilla wafers, and sprinkle of nilla wafer crumbs! [To keep the banana slices from turning brown, gently toss in a little bit of lemon juice for a few minutes.]

Recipe FAQ's
These cupcakes will last in the fridge for up to 3 days. However, they taste best when served at room temperature! I like to let them sit at room temperature for about an hour before serving. Wait to top with sliced bananas and nilla wafers until right before serving.
Gently toss the banana slices in a small amount of lemon juice and let sit for a few minutes before using! The bananas will still turn brown eventually, but the lemon juice keeps them looking fresh a lot longer!

Tips for Success!
For best results I always recommend using weight measurements (especially when baking) because it's the most accurate. Kitchen scales are super affordable and also reduce the number of dishes you have to do! However, all my recipes also include US customary measurements for convince. Use this chart to convert measurements for common ingredients!
Substitutions: In all my recipes, I've included substitutions that I know will work, but I cannot guarantee results if you substitute ingredients that I have not recommended. [For example, granulated sugar and honey are indeed both sweeteners but they have very different properties so they can not always be swapped 1:1. Using honey in a cookie recipe that calls for granulated sugar will yield a giant mess.] In the recipe card you'll find links to the specific ingredients/brands that I use.
A note on salt: I almost exclusively use Diamond Crystal Kosher Salt because it's the best all-purpose salt for cooking and baking. If you're not using kosher salt, consult this handy guide for a conversion chart! When in doubt, if you're using table salt just reduce the amount by half for baked goods. When cooking, I prefer to under-salt because you can always add more! If you've over-salted, adding a little bit of acid (like lemon juice) can help.
More Recipes You Might Like!
If you make this recipe, please leave a star rating at the bottom of the page! This provides helpful feedback to both me and other readers. And if you want more delicious, scratch-made recipes you can subscribe to my newsletter and follow along on Instagram, Pinterest, and Facebook!
Recipe Card
Banana Pudding Cupcakes
Special Equipment
Ingredients
Pudding
- 2 cups whole milk
- ½ cup granulated sugar
- 2 tablespoons cornstarch
- pinch kosher salt
- 2 large egg yolks
- 1 tablespoon unsalted butter, room temperature
- 2 teaspoons vanilla bean paste
- ½ teaspoon banana extract , optional
- 1 small banana, optional
Cupcakes
- 1 ½ cups cake flour, substitute all purpose flour
- 1 ½ teaspoons baking powder
- ¼ cup nilla wafer crumbs, about ½ cup whole cookies
- ¼ teaspoon kosher salt
- ½ cup unsalted butter, melted
- ½ cup granulated sugar
- ½ cup light brown sugar
- 1 large egg, room temperature
- ½ cup mashed banana, about 1 small banana
- 2 teaspoons vanilla extract
- ½ cup whole milk
Stabilized Whipped Cream
- 2 cups heavy whipping cream
- ½ cup powdered sugar
- 2 teaspoons flavorless powdered gelatin
- 2 tablespoons water
Garnish
- 1 small banana, sliced
- 1 tablespoon lemon juice
- nilla wafers
Instructions
Pudding
- Scald the milk in a large pot on the stove top over medium heat (or in the microwave), until it is almost boiling.
- In a large sauce pan, combine the cornstarch, sugar, and salt.
- Over medium-low heat, slowly add in the milk about ½ cup at a time while whisking constantly.
- As the filling begins to thicken, add in another ½ cup of milk and continue whisking.
- Once all of the milk is added and the filling has thickened (enough the coat the back of a spoon), remove the pot from the heat.
- Pour about ½ cup of the filling into a glass measuring cup and then slowly drizzle it into the beaten egg yolks, whisking constantly until fully combined and smooth.
- Pour the egg mixture back into the pot with the rest of the filling cook for an additional 2-3 minutes or until the filling has thickened to a pudding consistency.
- Stir in the butter and vanilla extract (and banana extract if using) until smooth.
- Pour the pudding through a fine mesh strainer to remove any lumps.
- Transfer to a bowl and cover with plastic wrap (place the plastic wrap directly on the surface of the vanilla pudding so a film doesn't form). Chill for at least 1 hour! Store in the fridge for up to a week.
- If desired, chop a banana into small chunks and gently stir into the pudding before filling the cupcakes for more banana flavor!
Cupcakes
- Preheat the oven to 350°F and line a 12 cup cupcake pan with cupcake liners
- Pulse the nilla wafers in a food processor until you have a little more than ¼ cup of crumbs.
- Whisk the cake flour, baking powder, nilla wafer crumbs, and salt together in a small bowl.
- In a separate bowl, whisk the melted butter, sugar, brown sugar together until fully combined.
- Then whisk in the egg, mashed banana, and vanilla together until combined.
- Stir in about half of the flour mixture. Then stir in the milk and the rest of the flour mixture and mix until fully combined.
- Pour about ¼ cup of batter into each cupcake liner (they should be about halfway full). Bake at 350°F for 18-22 minutes or until a cake tester comes out clean.
- Remove from pan and let cool on wire rack. Let the cupcakes cool completely before decorating.
Stabilized Whipped Cream
- Add the water to a microwave safe bowl and sprinkle the unflavored gelatin on top. Allow to sit for a few minutes.
- Transfer the gelatin mixture to the microwave and microwave for 5-10 seconds, until the gelatin is fully dissolved. Stir the mixture, then set aside to cool.
- In the bowl of a stand mixer fitted with the whisk attachment, or in a large mixing bowl using an electric mixer, combine the heavy whipping cream and powdered sugar.
- Whip the mixture until it starts to thicken and soft peaks form, then turn the mixer to low speed.
- Slowly pour in the gelatin mixture until well combined. Increase the mixer to medium speed and continue mixing until stiff peaks form.
Assembly
- Slice the banana and gently toss in lemon juice, then let sit for a few minutes. This helps keep the banana slices from turning brown.
- Use a cupcake corer to remove the center of each cupcake, then fill with about 2 teaspoons of chilled banana pudding.
- Transfer the stabilized whipped cream into a piping bag fitted with a 9FT tip and pipe swirls on each cupcake.
- Garnish the cupcakes with banana slices, nilla wafers, and a sprinkle of nilla wafer crumbs!
Notes
Nutrition
The nutritional information on this website is only an estimate and is provided for convenience and as a courtesy only. The accuracy of the nutritional information for any recipe on this site is not guaranteed.

sarah says
in the oven now-very excited to see the result. they look awesome and smell amazing ! thankyou