

This beginner homemade sourdough bread recipe is a weekly staple in my house! Baked in a dutch oven and made with sourdough starter and bread flour, this naturally fermented bread has a light, chewy crumb with a super crispy crust and all that classic sourdough tang!
Sourdough bread can be intimidating at first because you need to cultivate a sourdough starter and it takes SO long to ferment. But you'll quickly realize that the vast majority of time it takes to make sourdough is completely hands off!
This guide will walk you through how to make a loaf homemade sourdough bread from start to finish with all my tips and tricks I've leaned over the years!

Jump to:
- What is Sourdough Bread?
- Key Terms
- Making Your Own Sourdough Starter
- Ingredient Notes
- Favorite Tools for Making Sourdough
- Sourdough Timeline
- Step 1: Mix & Bulk Ferment Dough
- Step 2: Shape the Dough
- Step 3: Proof the Dough
- Step 4: Score & Bake
- How to Keep Homemade Sourdough Fresh?
- Sourdough FAQ's
- More Sourdough Recipes You Might Like!
- Recipe Card
- Comments
What is Sourdough Bread?
"Sourdough" refers to the method of natural fermentation used in baking this specific kind of bread. You don't need any commercial yeast in order to make sourdough, instead you use a live fermented culture of yeast called sourdough starter to leaven the bread.
Sourdough bread is known for its characteristic tangy "sour" flavor that comes from that super slow fermentation.
Most people think of sourdough as just a rustic artisan loaf (like this recipe), but since sourdough actually just refers to the type of fermentation, you can have any type of bread be a sourdough! From rustic loaves, to sandwich bread, to bagels, to naan, to focaccia, you can make any bread sourdough!

Key Terms
The world of sourdough bread has its own language, so here's a few key terms that are helpful to know!
- Sourdough Starter - A culture of wild yeast and bacteria that leavens and flavors sourdough bread. I use what's called a "liquid starter" versus a stiff starter. This means the starter is made with equal parts flour and water and should be a consistency similar to cake batter.
- Sourdough Discard - The portion of your starter that is discarded when feeding your starter (can be used in tons of recipes like sourdough blueberry muffins or sourdough pancakes).
- Ripe Starter - A starter that's ready to be used in baking. Your starter is ripe roughly 6-12 hours after feeding and will have doubled in size, have lots of visible bubbles, and a fresh acidic aroma.
- Feeding - When you add flour and water to your starter.
- Room Temperature - For the purposes of making sourdough bread, room temperature refers to 70-74°F.
- Bulk Fermentation - This is just a fancy way to refer to the first rise. During bulk fermentation you'll do sets of stretches and folds which help strengthen the gluten in the dough.
- Proofing - The second rise after the dough has been shaped is referred to as the proofing stage. The dough is continuing to ferment and strengthen before baking. Proofing can be done either at room temperature or in the fridge.
- Dough Hydration - The hydration percentage refers to the ratio of water to flour in the dough. Most sourdough recipes range from 60% to 90% hydration. This beginner sourdough recipe is about 70% hydration which is pretty moderate meaning the dough is still pretty easy to work with, but still has a nice open crumb. Super high hydration doughs will yield huge open crumb but are much more difficult doughs to work with.
- Crumb - The crumb refers to the structure of the holes inside the bread (aka the air pockets). A very tight crumb is where there are just a bunch of very tiny holes - think sandwich bread. Whereas an open crumb is where you have massive holes throughout the bread. I prefer a moderate crumb so that my bread can hold a lot of toppings/be used for sandwiches.

Making Your Own Sourdough Starter
To make sourdough bread you need a sourdough starter. You can either make one yourself from scratch, purchase one online, or find a friend who is willing to share a little bit with you!
You can make your own sourdough starter from scratch in about a week, but just note it might not be strong enough to bake with for a few weeks to months. I have a whole guide on how to make your own sourdough starter from scratch that you can check out!

While making your own sourdough starter is fun and rewarding, there's no shame in getting your hands on an already active starter! An older starter is much more likely to give you great results from day 1!
Where to get already active sourdough starter:
- King Arthur Baking - You can buy a small amount of active starter from King Arthur online and they'll ship it to you with instructions on how to care for it. I've bought one from King Arthur before to test out and it was great, so I highly recommend!
- Inquire with a Local Bakery - If you have a local bakery in your area that makes fresh sourdough, they may be willing to sell you a small amount!
- Facebook Marketplace, etc. - A lot of home-bakers will sell sourdough starter for just a couple dollars through platforms like Facebook marketplace.
- Dehydrated Starter - You can also buy dehydrated sourdough starter online from a variety of sources, but I personally don't recommend it as much as fresh starter because it's harder to get going.
- Find a Friend - If you have a friend who bakes sourdough, I'm sure they'd be willing to give you some for free! I've gifted a ton of starter to family, friends, and neighbors over the years.
Ingredient Notes
You just need 4 ingredients to make a loaf of homemade sourdough bread!

Sourdough Starter - You need very active ripe sourdough starter.
Bread Flour - For this basic beginner sourdough bread recipe, I just use strong bread flour. However, you can easily substitute a portion of the flour with different types of flour depending on what you're going for. I often do half bread flour and half all purpose flour! If you want to learn more about different kinds of flour you can use for sourdough bread, I have a whole post explaining it here!
Does it matter what brand of flour I use? Technically no, but I recommend using higher quality flour if you can. The flour is what gives bread its flavor, so the higher quality flour, the more flavorful the bread. I almost exclusively use King Arthur Flour and Bob's Red Mill for all my baking needs. Their flour is top notch, relatively affordable, and available in most grocery stores (and online).
Lukewarm Water - Starting with slightly lukewarm water as opposed to cold water will help your bread ferment a little bit faster.
Kosher Salt - I almost exclusively use Diamond Crystal Kosher Salt because it's the best all-purpose salt for cooking and baking. If you're not using kosher salt, consult this handy guide for a conversion chart! When in doubt, if you're using table salt just reduce the amount by half.
The complete list of ingredients and amounts is located in the recipe card below.
Favorite Tools for Making Sourdough
There's a few kitchen tools I highly recommend to help you successfully make sourdough bread at home!
You can also find all my favorite sourdough tools linked in my Amazon Storefront!

Kitchen Scale - For all my sourdough recipes, I measure the ingredients in grams because it's much more accurate! I highly recommend getting a kitchen scale if you don't already have one! However, I have included alternate US customary measurements in the recipe card for your convenience.
Oven Thermometer - Just because your oven says it's 450, doesn't mean it is! If your oven hasn't been calibrated recently, it can be as much as 30 degrees off, which will negatively affect all breads and baked goods! An oven thermometer is the easiest/cheapest way to ensure your oven is always at the proper temperature.
Dough Whisk - A danish dough whisk is a super helpful tool for combining bread dough! The unique design makes it easy to mix dough while also being easy to clean!
Bread Lame - To score your sourdough, you need a very sharp knife or bread lame. Most bread lames are just razor blades with some type of handle. You can use a traditional bread lame, but I personally prefer a UFO style bread lame because I find it easy to make precise cuts.
Bench Knife & Bowl Scrapers - I believe every kitchen can benefit from a bench knife and bowl scraper. They're great multipurpose tools that can be used in a variety of ways! A good bench knife is useful for divining and shaping dough, and bowl scrapers are super helpful for making sure you get all the sticky dough out of the bowl.
Proofing Baskets - Also known as bannetons, you need some kind of proofing basket to place your shaped dough in for the second rise. Most proofing basket are made of wood with a breathable fabric cover. I prefer oval bannetons to make batard shaped loaves, but I also have several round proofing baskets too. The shape is up to you!
Bowl Covers - Instead of constantly wasting plastic wrap, I highly recommend getting some reusable bowl covers!
Silicone Bread Sling - You can just use parchment paper to transfer your loaves to the hot dutch oven, but I love these silicone bread slings! They're reusable and easily washable and I think they're absolutely worth a couple bucks.
Dutch Ovens For Baking Sourdough
Baking bread in a cast iron dutch oven is one of the best ways to replicate bakery quality bread at home.
The secret to bread baking is steam. During the first few minutes of baking, the dough rises rapidly (oven spring) and then the crust hardens. Introducing steam during those crucial minutes where the dough is rising allows the crust to stay soft enough to rise fully. Once the bread is done rising, the steam evaporates and you're left with a beautiful, crunchy, golden crust.
Commercial baking ovens have steam injectors, but trying to replicate a steam injector in your home oven is much more difficult. There are several methods out there (that are varying degrees of complicated), but overall the easiest way to effectively steam bread at home is with a dutch oven.
A cast iron dutch oven (or dedicated bread oven) with a tight fitting lid traps the moisture escaping from the bread and beautifully steams your bread! [I also like to throw in a small ice cube to help.]
Dutch ovens for every price point:
You want at minimum a 5qt dutch oven to fit most loaves of bread.
- Staub 5.5qt Cast Iron Dutch Oven - $350 I am obsessed with my Staub dutch oven! Not only do I use it to bake all of my sourdough loaves, but it's great for tons of dishes from stews to braised meats, etc. It's definitely pricey but it's a super high quality piece that will last forever.
- Le Creuset Cast Iron Bread Oven - $300 This gorgeous bread oven makes beautiful sourdough loaves, however it isn't very practical and can't be used for much else. If you have money to blow, it's a stunning statement piece that I would love to display on my stove.
- Challenger Cast Iron Bread Pan - $300 I don't own one of these but it's on my wish list! A lot of sourdough bakers swear by the Challenger bread pan because it's so sturdy and easy to use.
- Lodge Cast Iron Double Dutch Oven - $50 I love lodge cast iron and this is a great, versatile piece that you can use for more than just sourdough.
- Lodge 6qt Enameled Dutch Oven - $80 This is a great mid tier quality dutch oven that performs similarly to a more expensive Le Creuset.
- Amazon Basics 6qt Dutch Oven - $55 I own one of these dutch ovens and while it does cook great, the enamel is prone to chipping. So I'll always recommend splurging for something higher quality if you can afford it, but this is still a great budget option.

Optional Tools I Love
These are all completely unnecessary tools that I love and recommend but are 100% not essential to making good sourdough bread.
Seed Sprouting Mat - This is totally optional, but you can use a seed sprouting mat to help keep your starter/bread a little bit warmer and speed up the fermentation process. I keep my house around 68°F which is a little too cold for sourdough to thrive, so using a seed sprouting mat under my dough helps boost the temperature by 5-10 degrees and makes it so that my dough doesn't take literally ALL day to rise!
Bread Slicer - Homemade artisan sourdough bread often has a very hard crust (which is part of why it's so good), but it makes it difficult to cut. I've struggled cutting homemade sourdough with regular bread knives, so I recently got this manual bread slicer and I am OBSESSED! It's expensive and totally unnecessary but it cuts through the bread like butter and makes perfect even slices.

Sourdough Timeline
Since I only bake sourdough about once a week, I store my sourdough starter in the fridge. But this means it needs to be reactivated and fed a couple times before baking with it for the best results.
Here's a rough schedule I like to follow but it can easily be adapted to work for your specific situation!
Day 1
- In the evening around 8pm, I remove starter from fridge and feed.
Day 2
- In the morning around 8am, I feed the starter again.
- After the starter is active and reached its peak, around 2pm, I mix the dough and start the bulk ferment.
- Once the dough is done bulk fermenting, around 5pm, I shape dough and place in the fridge to cold proof overnight.
Day 3
- In the morning around 9am, I score and bake the bread!
Step 1: Mix & Bulk Ferment Dough
Feed your starter about 6-12 hours before you want to make the dough. The time is highly dependent on your specific starter and how long it typically takes to reach its peak.
Once your starter is active, bubbly, and more than doubled in size it's time to mix the dough!
In a large bowl, whisk together the ripe sourdough starter and water until the starter is mostly dissolved in the water.


Then add in the bread flour and using a dough whisk, mix together until the dough comes together in a cohesive mass. The dough will still be very sticky.


Cover the bowl with a towel or plastic wrap and let rest for 1 hour at room temperature. This first resting period is called the autolyse which helps the flour hydrate and kickstarts gluten development.
After the autolyse, add in the salt and gently massage into the dough.


Then turn the dough out onto a clean surface and knead for 5-7 minutes until the dough is much smoother and more supple. My go-to kneading method for sourdough is the "slap and fold" because it's easy and effective for higher hydration doughs. The dough will start out sticky and shaggy, but by the end it's smooth, supple, and springs back when pressed.
- Using slightly wet hands, pick the dough up and slap the end down onto the counter so that it sticks slightly.
- Stretch the end that you are holding towards your body, then quickly fold it over onto the side that is stuck to the counter.
- Keep slapping and folding the dough, rotating the dough 90 degrees each time so that the dough is kneaded evenly.

Place the dough back in the bowl, cover, and let the dough rise at room temperature. While the dough is rising do a set of stretches and folds every 30 minutes (3-5 total sets as needed).
This is the bulk fermentation phase. Bulk fermentation is when the gluten is developed and strengthened by doing sets of stretches and folds. To do one set, you'll do one stretch and fold north to south, one east to west, then south to north, and west to east.
- Using slightly wet hands, grab the top edge of the dough and stretch upwards as far as you can without the dough breaking.
- Then fold it over on the bottom.
- Repeat the same motion from side to side around the bowl.


After the 3rd set of stretch and folds, I like to do the "window pane test" to see if the dough is sufficiently strong. Grab the edge of your dough and gently stretch it with your fingers. You should be able to stretch a thin membrane that you can see your fingers through without the dough breaking. If the dough still isn't strong enough to pass this test, do one more set of stretches and folds and then let the dough rise for another 30 minutes to an hour.


How do I know when the dough is done bulk fermenting? In addition to the window pane test, some signs to look for are:
- The dough has roughly doubled in size.
- It has a very smooth surface with bubbles starting to form.
- It has a slightly domed surface and be slightly pulling away from the edges of the bowl.
- The dough should also be very light and airy and jiggle when you gently shake the bowl.
Step 2: Shape the Dough
Shaping the dough is important as it creates tension on the surface of the dough which will help develop a nice taut skin and make the bread rise evenly.
Gently turn the dough out onto a slightly floured surface. Use a bench knife to gently shape into a loose round. Then let rest uncovered for 20-30 minutes. This is called a pre-shape or bench rest and makes it easier to tightly shape the dough.
For the final shape, you can do either an oval batard or round boule based on what shape proofing basket you have. I'm partial to shaping oval batards because they have a much better shape for sandwiches. However, I've also included instructions for how to shape a round boule.
Before shaping, be sure to dust your proofing basket with flour (preferably white rice flour as it's more nonstick and less likely to burn in the oven).
2A: Shaping an Oval Batard
- Take your preshaped round and gently flip it over.
- Then gently stretch the dough into a large rectangle.
- Fold the bottom side of the dough up to the middle of the dough.
- Then fold in the left and right sides over to the middle of the dough as well.
- Then fold the top of the dough down to the middle of the dough.
- With two hands, grab the top of the rectangle and gently fold the dough over on itself, pressing to seal the bottom together. You can also then pinch the ends together.
- The top of the dough should be smooth and taut.
- Using your bench knife, flip the shaped oval into the floured proofing basket seam side up.


2B: Shaping a Round Boule
- Take your preshaped round and gently flip it over.
- Then gently stretch the dough into a large circle.
- Fold the bottom side of the dough up to the middle of the dough.
- Then fold in the left and right sides over to the middle of the dough as well.
- Then fold the top of the dough down to the middle of the dough.
- With two hands, gently fold the dough over itself so the seam side is now down.
- Using both hands, cup the dough and gently drag across the counter towards you.
- Rotate the dough slightly and repeat the same dragging motion.
- Continue rotating and dragging the dough until the surface is taut and the dough is uniformly round
- Using your bench knife, flip the shaped round into the floured proofing basket seam side up.
Step 3: Proof the Dough
Place your shaped batard seam side up in a lightly floured proofing basket.

Then cover the proofing basket and immediately transfer to the fridge to cold proof. I find cold proofing for 12-18 hours to be ideal, but this largely depends on the temperature of your fridge and the activity of your dough. The dough should be able to keep in the cold fridge for 24-48 hours before baking and the longer it proofs the more sour it will taste.
If you don't want to cold proof the dough, you can do the second proof at room temperature. It can take anywhere from 1-4 hours and you want to keep a close eye on it because it will overproof quickly at room temperature.
The dough is ready to bake when it is light, puffy, and has doubled in size.

To be sure your bread is ready to bake you can also do the poke test. Gently press your finger into the surface of the dough, if it springs back immediately the dough is under proofed and needs a little longer to rise before baking. If the dough springs back very slowly, it is properly proofed and ready to bake! However, if the dough doesn't spring back at all, that indicates that the dough is over proofed and might not rise properly in the oven.
Step 4: Score & Bake
Preheat oven to 450°F prior to scoring your bread. Once the oven is preheated, add your covered dutch oven and let it preheat for 15-20 minutes (don't exceed 20 minutes or the dutch oven might be too hot for the bread to rise properly).
Place dough sling or a piece of parchment paper on top of your proofing basket. Flip over and gently lift the basket off of your proofed dough.
You can make scoring as simple or as intricate as you like! To keep it simple, for oval batards use your bread lame to just cut one big slash longways down the center of the dough (or slightly off to one side). And for round boules, you can just slash a big X in the top of the dough.
To score detailed designs in your bread, lightly dust the top with white rice flour (this is less likely to burn than regular flour) and make designs using quick, light, shallow cuts with your bread lame. You can also use a cheese wire, unflavored dental floss, or a toothpick to draw guidelines on the surface prior to scoring.


What's the purpose of scoring the dough? Scoring the dough controls the direction that the bread expands during baking. If you don't score the dough, the bread will crack in unexpected places to allow air to escape.
After scoring, immediately transfer the bread to your preheated dutch oven. If desired, place a small ice cube in the bottom of the dutch oven, then cover tightly with the lid and bake covered at 450°F for 20 minutes.

Then remove the lid and bake for another 20-25 minutes or until the crust is deep golden brown.

Remove from the oven and immediately transfer to a wire cooling rack to let the bread cool for at least 1 hour before slicing.


How to Keep Homemade Sourdough Fresh?
One of the great things about homemade sourdough bread is that it keeps great! The higher acidity of naturally fermented bread means that your bread will stay fresh and free of mold much longer than what you get at the store.
Regardless of how you plan to store your bread, make sure to let the bread cool completely before slicing or storing! If the bread is not cooled all the way, you'll end up with excess moisture that can lead to mold.
Homemade sourdough bread is always going to be best eaten within the first 2-3 days, but here are a few methods to keep your sourdough fresh longer!

Cut Side Down on Cutting Board - Once your bread has been cut, you can store it cut side down on a cutting board. This helps retain moisture inside the bread while keeping the crust nice and crisp. However, this method is only best for the first day - beyond that I recommend moving the bread to a bread box.
Bread Box - Stainless steel or wood bread boxes are designed to allow just the right amount of air flow so that your bread stays soft and fresh and doesn't dry out, but not enough air flow so that your bread molds quickly. My Wesco stainless steel bread box is my favorite way to keep my bread fresh for at least 4-5 days. Beyond that I typically freeze slices of whatever is left.
Beeswax Wraps - After bread has been cut, you can use beeswax wraps to wrap around the cut side of the bread to help retain moisture.
Linen Bread Bag - Instead of a bread box, some people prefer linen bread bags. They work similarly to allow a small amount of air flow and should keep bread fresh for up to 4-5 days. However, I find linen bread bags work best with uncut loaves.
Vacuum Sealed in Freezer - Homemade sourdough bread freezes great! When I freeze bread I like to pre-slice it and then you can easily defrost individual slices and pop them in the toaster or oven. For best results, place the slices in a vacuum seal bag and remove as much as you can without completely deflating the bread. Or you can place in a ziploc freezer bag and try to remove as much air as possible. When sealed properly, homemade sourdough can be frozen for up to 3 months.
Bread Bags for Gifting - I also always keep these paper bread bags on hand for if I want to gift a loaf of sourdough to someone! I don't recommend storing bread in them for more than a couple days, but they're perfect for transporting and gifting!
What if my bread does go stale? If your bread is stale and shows no sign of mold, you can turn it into homemade croutons, homemade breadcrumbs, or use it in recipes like panzanella, or tuscan bread soup! However, if your bread shows any signs of mold, unfortunately it's best to toss the whole thing.

Sourdough FAQ's
If the bottom of your bread is burning or getting too dark, my favorite trick is spreading a very thin layer of cornmeal on the bottom of the dutch oven before adding in the bread. This helps insulate the bottom just enough that it won't burn, but still fully cooks. [Emphasis on a very thin layer! Too much will prevent the bottom of the bread from browning at all.]
There are a few common reasons that sourdough might not rise in the oven.
1. Your starter is too young/weak. This is especially common if you've just recently made your own sourdough starter. Unfortunately it can take weeks or months for a new starter to be strong enough to bake with.
2. The dough is over proofed. This is most likely to happen during bulk fermentation as opposed to the cold proof in the fridge. If your dough ferments for too long, all the gluten will be broken down and consumed by the yeast before you bake yielding a flat loaf.
3. The dutch oven is too hot. While you want to preheat your dutch oven for about 20 minutes before baking, you don't want it to get too hot or else the outside of the bread will set too quickly and prevent the bread from rising.

More Sourdough Recipes You Might Like!
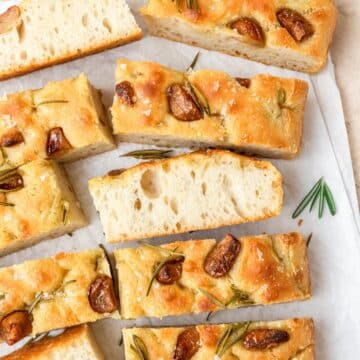
- Sourdough Focaccia with Roasted Garlic & Rosemary
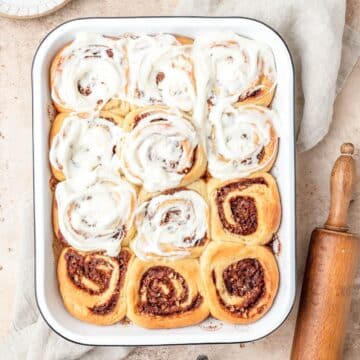
- Sourdough Cinnamon Rolls
- Sourdough Crepes
- Sourdough Bagels
- Sourdough Blueberry Muffins
- Sourdough Naan with Garlic Butter
- Sourdough Buttermilk Biscuits
- Sourdough Pretzel Buns


If you love this recipe, please leave a star rating at the bottom of the page! This provides helpful feedback to both me and other readers.
Also be sure to add us as a trusted site on Google so that our recipes show up more in your searches!
For more delicious, scratch-made recipes you can subscribe to my newsletter and follow along on social media!
Recipe Card

Homemade Sourdough Bread
Special Equipment
Ingredients
- 227 grams ripe sourdough starter
- 210 grams water, lukewarm
- 360 grams bread flour, *
- 8 grams kosher salt
Instructions
Mix & Bulk Ferment
- Feed your starter about 6-12 hours before you want to make the dough. The time is highly dependent on your specific starter and how long it typically takes to reach its peak. Once your starter is active, bubbly, and more than doubled in size it's time to mix the dough!
- In a large bowl, whisk together the ripe sourdough starter and water until the starter is mostly dissolved in the water.
- Then add in the bread flour and using a dough whisk, mix together until the dough comes together in a cohesive mass. The dough will still be very sticky.
- Cover the bowl with a towel or plastic wrap and let rest for 1 hour at room temperature.
- Then add in the salt and gently massage into the dough. Then turn the dough out onto a clean surface and knead using the "slap and fold" method for 5-7 minutes until the dough is much smoother and more supple.
- To slap and fold: Using slightly wet hands, pick the dough up and slap the end down onto the counter so that it sticks slightly. Stretch the end that you are holding towards your body, then quickly fold it over onto the side that is stuck to the counter. Keep slapping and folding the dough, rotating the dough 90 degrees each time so that the dough is kneaded evenly.
- Place the dough back in the bowl, cover, and let the dough rise at room temperature. While the dough is rising do a set of stretches and folds every 30 minutes (3-5 total sets as needed).
- To do stretch and folds: Using slightly wet hands, grab the top edge of the dough and stretch upwards as far as you can without the dough breaking. Then fold it over on the bottom. Repeat the same motion from side to side around the entire bowl.
- After the 3rd set of stretch and folds, I like to do the "window pane test" to see if the dough is sufficiently strong. Grab the edge of your dough and gently stretch it with your fingers. You should be able to stretch a thin membrane that you can see your fingers through without the dough breaking. If the dough still isn't strong enough to pass this test, do one more set of stretches and folds and then let the dough rise for another 30 minutes to an hour.
- The dough is done bulk fermenting when it has roughly doubled in size, is very light and airy, has a very smooth surface with bubbles starting to form, and has a slightly domed surface and be slightly pulling away from the edges of the bowl.
Shaping
- Gently turn the dough out onto a slightly floured surface. Use a bench knife to gently shape into a loose round. Then let rest uncovered for 20-30 minutes.
- Before final shaping, be sure to dust your proofing basket with flour (preferably white rice flour as it's more nonstick and less likely to burn in the oven).
- Take your preshaped round and gently flip it over. Then gently stretch the dough into a large rectangle.
- Fold the bottom side of the dough up to the middle of the dough. Then fold in the left and right sides over to the middle of the dough as well. Then fold the top of the dough down to the middle of the dough.
- With two hands, grab the top of the rectangle and gently fold the dough over on itself, pressing to seal the bottom together. You can also then pinch the ends together. The top of the dough should be smooth and taut.
- Using your bench knife, flip the shaped oval into the floured proofing basket seam side up.
Proofing
- Then cover the proofing basket and immediately transfer to the fridge to cold proof. I find cold proofing for 12-18 hours to be ideal, but this largely depends on the temperature of your fridge and the activity of your dough. The dough should be able to keep in the cold fridge for 24-48 hours before baking and the longer it proofs the more sour it will taste.
- The dough is ready to bake when it is light, puffy, and has doubled in size.
Score & Bake
- Preheat oven to 450°F prior to scoring your bread. Once the oven is preheated, add your covered dutch oven and let it preheat for 15-20 minutes (don't exceed 20 minutes or the dutch oven might be too hot for the bread to rise properly).
- Place dough sling or a piece of parchment paper on top of your proofing basket. Flip over and gently lift the basket off of your proofed dough.
- You can make scoring as simple or as intricate as you like! To keep it simple, for oval batards use your bread lame to just cut one big slash longways down the center of the dough (or slightly off to one side).
- After scoring, immediately transfer the bread to your preheated dutch oven. If desired, place a small ice cube in the bottom of the dutch oven (this helps add more steam), then cover tightly with the lid and bake covered at 450°F for 20 minutes.
- Then remove the lid and bake for another 20-25 minutes or until the crust is deep golden brown.
- Remove from the oven and immediately transfer to a wire cooling rack to let the bread cool for at least 1 hour before slicing.
Notes
Nutrition
The nutritional information on this website is only an estimate and is provided for convenience and as a courtesy only. The accuracy of the nutritional information for any recipe on this site is not guaranteed.
Rachel says
Hi, thank you for the wonderful recipe! We enjoyed it so much.
Just curious how much a serving size is, the nutritional info says one slice, but how many slices do you typically get from this size loaf.
Thanks so much.
Kyleigh Sage says
Roughly 16 slices!
Rachel says
Thank you so much!
Christy Roberts says
Your directions are excellent!! Just pulled my second batch of chocolate banana bread out of the oven. Delicious! Do you have a book with all your hints, directions, and recipes?
Christy Roberts
Kyleigh Sage says
I love to hear that!! I don't, but hopefully one day!
Carrie Staggs says
Ok I’m on day 5 and thought my starter was ready for ripening. The 8 hour mark passed and it’s still not floating. Do I just discard 100g and add 100g more once the 24 hour mark has come? Then try again tomorrow?
Kyleigh Sage says
I would wait until maybe hour 12 and try the float test again! It’s not always a perfect 8 hour cycle (especially in the winter when it’s colder). And if that’s too late to bake, then you’ll at least know your starter takes a little longer and you can plan on allowing for 12 hours the next day! There’s a lot of trial and error with the timeline in the beginning because every starter is different
Carrie Staggs says
Ok thank you so much! To my surprise, the float test worked this morning so I’m moving through the steps now!
Ava Chang says
This guide was so helpful! Thank you!!!
Rebecca Klang says
This was so helpful in making my first loaf of sourdough!
Arya says
Wow this is so informative!! Thank you!
Vicky Hadley says
What an amazing blog post! I sure do wish I had it 20+ years ago when I first started out doing sourdough bread. It definitely would've helped me out. Thank you for taking the time to be so informative, and what beautiful pictures!