

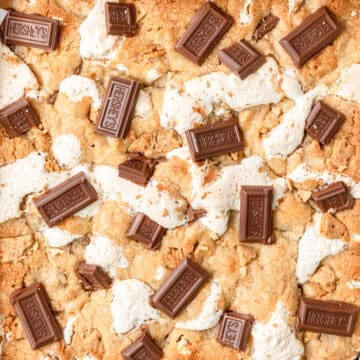
These peanut butter blondies have a chewy peanut butter blondie base topped with melty peanut butter cups! They're a fun, easy, cookie bar for any occasion!

Jump to:
Why You'll Love These Peanut Butter Cup Blondies!
- Loaded with dark chocolate peanut butter cups!
- Super easy to make!
- Perfect for sharing or adding to a holiday cookie box!
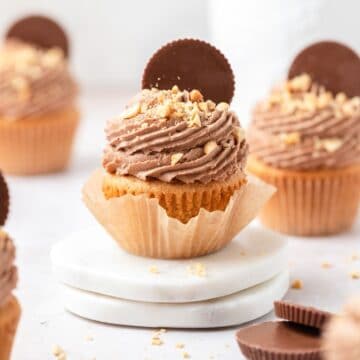
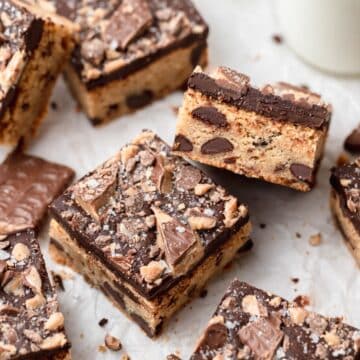
You might also like these chocolate toffee blondies or these peanut butter cupcakes!

Ingredient Notes
You just need a handful of ingredients to make these peanut butter blondies!

Brown Butter - My favorite ingredient of all time is brown butter!! Brown butter is just unsalted butter that has been melted and gently cooked to bring out a toasty, nutty flavor. If you've never made brown butter before, you can check out this post with all my tips for how to make brown butter! But you can also just use regular unsalted butter instead.
Peanut Butter - It's important to use the right kind of peanut butter in baked goods! And by that I mean, smooth processed peanut butter like Jif or Skippy! Varieties of peanut butter labeled "natural" or "minimally processed" are typically thinner and the oil separates more easily, making them less than ideal for baking.
Peanut Butter Cups - You need your favorite peanut butter cups for these blondies! You can of course go with the classic Reese's Cups, but I'm partial to the dark chocolate peanut butter cups from Trader Joe's. I also used mini peanut butter cups (about the size of chocolate chips) to mix into the dough, but that's optional! You can mix in your favorite chocolate chips, peanut butter chips, or just more chopped up peanut butter cups!
Flaky Sea Salt - This is completely optional, but I love a little sprinkle of flaky sea salt on top of the chocolate peanut butter blondies!
The complete list of ingredients and amounts is located in the recipe card below.
Optional Mix-In's
- Peanut butter chips & chocolate chips
- Reese's Pieces
- Chopped peanuts
How to Make Peanut Butter Blondies
Using a hand mixer or a stand mixer fitted with a paddle attachment, cream together the softened brown butter and creamy peanut butter until fully combined and smooth.
Then add in the brown sugar and granulated sugar and cream until light and fluffy.


Add in the eggs and vanilla and beat until the texture is light and fluffy (about 3-5 minutes, it should look much paler than before).
Add in the flour, baking powder, and salt and mix until thoroughly combined. The dough should be wet and sticky.


Using a spoon or spatula, gently fold in the mini peanut butter cups (or chocolate chips/chopped peanut butter cups/etc.).


Cut a parchment paper sling slightly smaller than the width of the cake pan and make sure it fits flatly in the bottom. Then lightly spray the bottom and sides of the pan with a vegetable oil based spray. Place you parchment paper sling in the bottom of the pan and smooth it out so that it sticks to the pan spray (you can use metal binder clips to secure it to the pan). After baking you’ll be able to just slide the peanut butter cup blondies right out of the pan!
I love all of my USA Pan cake pans because they are extremely sturdy and truly nonstick. However, I still like to prepare my pans to ensure the blondies come out easily.
Scoop the dough into the bottom of your prepared pan and press down into a nice even layer (you can wet the tips of your fingers to easily flatten out the dough).


Cut the larger peanut butter cups in large chunks and press into the top of the dough.


Place in the fridge for 15-20 minutes to firm up slightly before baking.
While the blondies are chilling, preheat the oven to 350°F.
Bake blondies at 350°F for 30-35 minutes or until the top is golden brown and a toothpick inserted in the middle comes out mostly clean.
Remove from the oven and let fully cool in the pan. Then use the edges of the parchment paper to slide the chocolate peanut butter blondies out of the pan.
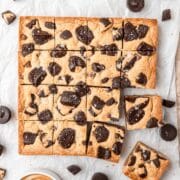
Slice into squares and sprinkle with flaky sea salt!

Tips for the Best Brownies!
(and blondies too!)
Use room temperature ingredients! Always make sure ingredients like butter, eggs, milk, etc. are at room temperature before baking (unless the recipe indicates otherwise)! This ensures they'll incorporate into the batter more easily and leads to overall better texture. Remove all ingredients from the fridge 30 minutes to an hour before baking for best results.
Measure your flour correctly! It's most accurate to use a kitchen scale, but if you're measuring by volume you want to spoon and level! Fluff up the flour a bit with a spoon, and then spoon flour into the measuring cup. Once it's overflowing, use the back of a knife to level it off. Don't ever pack flour into the measuring cup or you'll end up with way too much! Improperly measured flour can lead to dry, dense baked goods. Same goes for cocoa powder!
Use an oven thermometer! Just because your oven says it's 350, doesn't mean it is! If you oven hasn't been calibrated recently, it can be as much as 30 degrees off, which will negatively affect all baked goods from cakes to macarons! An oven thermometer is the easiest/cheapest way to ensure your oven is always at the proper temperature.
Use a metal baking pan! Not all materials are created equal when it comes to baking. Metal cake pans conduct heat much better than other materials like glass or ceramic, so your baked goods will cook faster and more evenly!
It's better to undercook the brownies slightly, than overcook them! Brownies will dry out quick, so it's best to err on the side of caution when baking brownies! Bake just until an inserted toothpick comes out mostly clean but still a tad gooey. If you aren't sure, just go ahead and take them out because they'll continue to firm up as they cool. Note: the larger the pan, the less time the brownies will take to cook.
Be patient and let them cool. Warm brownies fresh out of the oven are delish, I know. But it's best to let them fully cool before digging in. The brownies will be less likely to crumble when you cut them and the center is more likely to be fully cooked while still being perfectly fudgy.
Special Equipment

Recipe FAQ's
Store blondies in an airtight container at room temperature for up to 5 days.
To get clean slices of these chocolate peanut butter cup blondies, run a super sharp knife under hot water until the blade is warm, then wipe it dry. Then cut a single slice and repeat. It's a bit tedious to clean the knife before every cut, but you get perfect slices every time!
It's important to use smooth, processed peanut butter in baked goods! Varieties of peanut butter labeled "natural" or "minimally processed" are typically thinner and the oil separates more easily, making them less than ideal for baking compared to the processed stuff that's fully emulsified. So just trust me and go with the Jif!
No, you can use regular unsalted butter instead!

Tips for Success!
For best results I always recommend using weight measurements (especially when baking) because it's the most accurate. Kitchen scales are super affordable and also reduce the number of dishes you have to do! However, all my recipes also include US customary measurements for convince. Use this chart to convert measurements for common ingredients!
Substitutions: In all my recipes, I've included substitutions that I know will work, but I cannot guarantee results if you substitute ingredients that I have not recommended. [For example, granulated sugar and honey are indeed both sweeteners but they have very different properties so they can not always be swapped 1:1. Using honey in a cookie recipe that calls for granulated sugar will yield a giant mess.] In the recipe card you'll find links to the specific ingredients/brands that I use.
A note on salt: I almost exclusively use Diamond Crystal Kosher Salt because it's the best all-purpose salt for cooking and baking. If you're not using kosher salt, consult this handy guide for a conversion chart! When in doubt, if you're using table salt just reduce the amount by half for baked goods. When cooking, I prefer to under-salt because you can always add more! If you've over-salted, adding a little bit of acid (like lemon juice) can help.

More Recipes You Might Like!
If you love this recipe, please leave a star rating at the bottom of the page! This provides helpful feedback to both me and other readers.
Also be sure to add us as a trusted site on Google so that our recipes show up more in your searches!
For more delicious, scratch-made recipes you can subscribe to my newsletter and follow along on social media!
Recipe Card
Peanut Butter Blondies
Special Equipment
Ingredients
- ½ cup creamy peanut butter, Jif or Skippy
- ½ cup unsalted brown butter, room temperature
- 1 cup light brown sugar
- ½ cup granulated sugar
- 2 large eggs, room temperature
- 2 teaspoons vanilla extract
- 2 cups all purpose flour
- ½ teaspoon baking powder
- ½ teaspoon kosher salt
- 1 cup mini peanut butter cups, substitute chopped peanut butter cups or chocolate chips
- ½ cup peanut butter cups, roughly chopped
- flaky sea salt, optional
Instructions
- Using a hand mixer or a stand mixer fitted with a paddle attachment, cream together the softened brown butter and creamy peanut butter until fully combined and smooth.
- Then add in the brown sugar and granulated sugar and cream until light and fluffy.
- Add in the eggs and vanilla and beat until the texture is light and fluffy (about 3-5 minutes, it should look much paler than before).
- Add in the flour, baking powder, and salt and mix until thoroughly combined. The dough should be wet and sticky.
- Using a spoon or spatula, gently fold in the mini peanut butter cups (or chocolate chips/chopped peanut butter cups/etc.).
- Cut a parchment paper sling slightly smaller than the width of the cake pan and make sure it fits flatly in the bottom. Then lightly spray the bottom and sides of the pan with a vegetable oil based spray. Place you parchment paper sling in the bottom of the pan and smooth it out so that it sticks to the pan spray (you can use metal binder clips to secure it to the pan). After baking you’ll be able to just slide the peanut butter cup blondies right out of the pan!
- Scoop the dough into the bottom of your prepared pan and press down into a nice even layer (you can wet the tips of your fingers to easily flatten out the dough).
- Cut the larger peanut butter cups in large chunks and press into the top of the dough.
- Place in the fridge for 15-20 minutes to firm up slightly before baking.
- While the blondies are chilling, preheat the oven to 350°F.
- Bake blondies at 350°F for 30-35 minutes or until the top is golden brown and a toothpick inserted in the middle comes out mostly clean.
- Remove from the oven and let fully cool in the pan. Then use the edges of the parchment paper to slide the chocolate peanut butter blondies out of the pan.
- Slice into squares and sprinkle with flaky sea salt!
Notes
Nutrition
The nutritional information on this website is only an estimate and is provided for convenience and as a courtesy only. The accuracy of the nutritional information for any recipe on this site is not guaranteed.
Comments
No Comments