This chocolate peanut butter pie has a crunchy Oreo pie crust filled with a creamy peanut butter mousse, then topped with a layer of dark chocolate ganache and chopped peanut butter cups! It's a super simple dessert that everyone will enjoy!

You might also like this chocolate raspberry tart or these peanut butter cup blondies!
Jump to:
Ingredient Notes
You only need a few ingredients to make this chocolate peanut butter pie!

Oreo Crust - For the Oreo cookie crust you just need Oreo's and melted butter! You could also substitute with chocolate graham crackers.
Peanut Butter - It's important to use the right kind of peanut butter in baked goods! And by that I mean, smooth processed peanut butter like Jif or Skippy! Varieties of peanut butter labeled "natural" or "minimally processed" are typically thinner and the oil separates more easily, making them less than ideal for baking.
Cream Cheese - The peanut butter filling is made with cream cheese, but you can also substitute with mascarpone cheese (I actually prefer this because mascarpone has a milder flavor).
Heavy Whipping Cream - You need heavy cream both to make the whipped cream and the chocolate ganache.
Dark Chocolate - When making chocolate ganache, you want to use a high quality chocolate baking bar because they're designed to melt smoothly and they have the best flavor! Chocolate bars that are meant for eating and chocolate chips contain added emulsifiers that cause them to not melt as smoothly. Some of my favorite baking chocolate bars are:
- Guittard - This is my number one choice! It's super high quality, affordable, and pretty easy to find. You can usually get it at Whole Foods or Target.
- Vahlrona - This is the chocolate that a lot of pastry chefs swear by! It's usually hard to find in stores, but comes in a ton of different forms and is easy to purchase online.
- Callebaut - This is amazing chocolate that comes in block form, but is usually much harder to find but Whole Foods usually has it as do specialty stores.
- Scharffen Berger - I've never actually tried this brand but I've heard a lot of great things about it.
- Ghirardelli - The most affordable and widely available baking bars that are still high quality! I always have either their semi-sweet or bittersweet baking bars on hand even though it's not my number one choice.
The complete list of ingredients and amounts is located in the recipe card below.
Topping Suggestions
Peanut Butter Cups - I like to garnish the peanut butter pie with chocolate peanut butter cups! You can of course go with the classic Reese's Cups, but I'm partial to the dark chocolate peanut butter cups from Trader Joe's.
Some other fun topping options are:
- Chopped peanuts
- Chocolate or peanut butter chips
- Crushed Oreos
- Chocolate shavings
- Chocolate drizzle
- Flaky sea salt
Variations
Peanut Butter & Jelly Pie - Instead of chocolate peanut butter pie, you can make a couple simple swaps for a pb&j pie! Swap the Oreo crust for graham cracker crust, and add a layer of your favorite fruit jelly on the bottom of the crust before adding the peanut butter filling, then garnish with crushed peanuts and fresh fruit!
Nutella Pie - Swap the peanut butter for Nutella for a fun Nutella pie variation! Instead of topping with peanut butter cups, top with chocolate shavings, chopped hazelnuts, or Ferrero rochers!
How to Make Peanut Butter Pie
Preheat the oven to 350°F.
Pulse the Oreo cookies (filling and all) in a food processor until you have about 2 cups of finely ground crumbs.


In a large bowl, combine the cookie crumbs and melted butter. Mix until it resembles wet sand.
Press the mixture into the bottom of the pie pan and up the sides. Make sure it is tight and compact! You can use the bottom of a flat measuring cup to help pack down the crust.
Bake the crust at 350°F for 8-12 minutes or until it's dried out.


Let the crust fully cool to room temperature before filling.
In a large bowl, use a hand mixer to beat the softened cream cheese until smooth. Then add in the peanut butter and mix until fully combined.


Add in ¼ cup of the powdered sugar, vanilla extract, and salt and mix on high for 3-4 minutes or until the peanut butter mixture is light and fluffy.
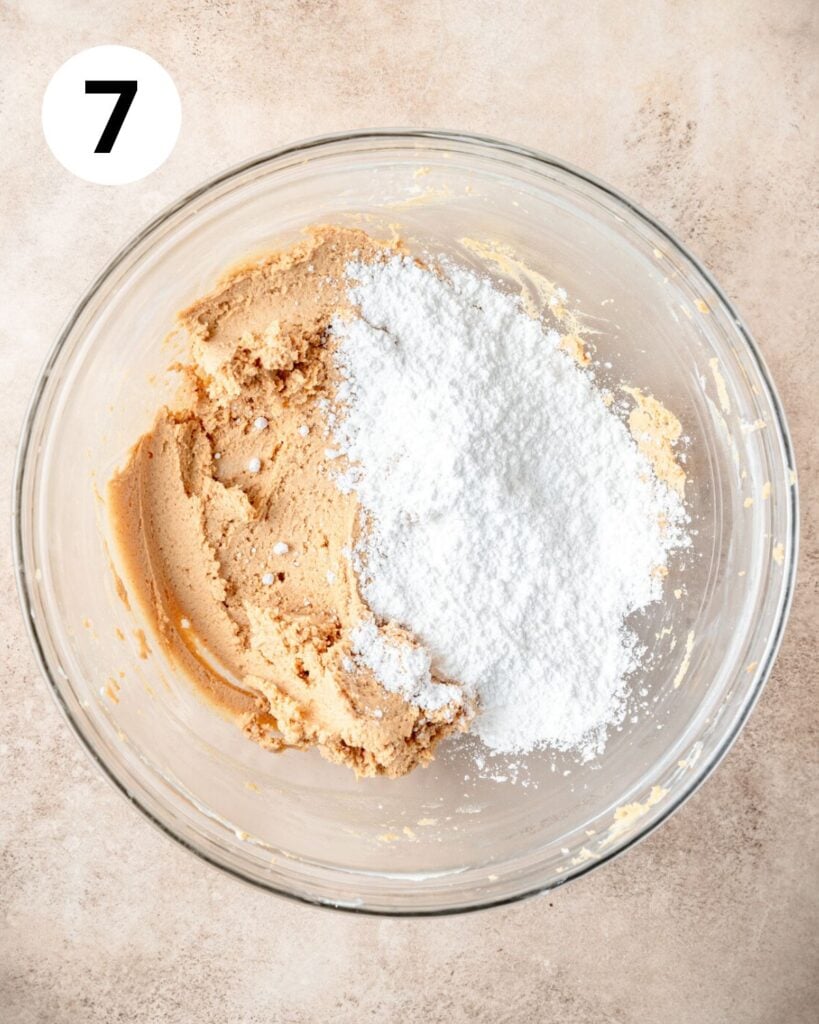

In a separate bowl, beat together the heavy whipping cream and the remaining ¼ cup powdered sugar until stiff peaks form.
Gently fold the whipped cream into the peanut butter mixture until fully combined.


Pour the peanut butter filling into the cooled pie crust and smooth into an even layer.
Chill in the fridge for at least 4 hours (overnight is even better) or until fully set.

Finely chop the dark chocolate and place into a large bowl.
Place the heavy cream in a microwave safe bowl and microwave for 1-2 minutes or until hot to the touch but not boiling. Pour over the chopped chocolate and let sit for about two minutes.
Using a spatula, gently mix until the chocolate is fully melted and the ganache is fully combined and smooth.


Pour the dark chocolate ganache over the chilled peanut butter layer and smooth into an even layer.
Chill in the fridge for at least 2 hours or until the chocolate is fully set.

If desired, garnish the chocolate peanut butter pie with chopped peanut butter cups before serving.

Recipe FAQ's
Store covered in the fridge for up to 3 days. Make sure to keep the pie refrigerated because it will begin to melt if left out for too long.
To get clean slices of this peanut butter pie, run a super sharp knife under hot water until the blade is warm, then wipe it dry. Then cut a single slice and repeat. It's a bit tedious to clean the knife before every cut, but you get perfect slices every time!
Yes! You can use the graham cracker crust recipe from my classic key lime pie.
It's important to use smooth, processed peanut butter when baking! Varieties of peanut butter labeled "natural" or "minimally processed" are typically thinner and the oil separates more easily, making them less than ideal for baking compared to the processed stuff that's fully emulsified. So just trust me and go with the Jif!

Tips for Success!
For best results I always recommend using weight measurements (especially when baking) because it's the most accurate. Kitchen scales are super affordable and also reduce the number of dishes you have to do! However, all my recipes also include US customary measurements for convince. Use this chart to convert measurements for common ingredients!
Substitutions: In all my recipes, I've included substitutions that I know will work, but I cannot guarantee results if you substitute ingredients that I have not recommended. [For example, granulated sugar and honey are indeed both sweeteners but they have very different properties so they can not always be swapped 1:1. Using honey in a cookie recipe that calls for granulated sugar will yield a giant mess.] In the recipe card you'll find links to the specific ingredients/brands that I use.
A note on salt: I almost exclusively use Diamond Crystal Kosher Salt because it's the best all-purpose salt for cooking and baking. If you're not using kosher salt, consult this handy guide for a conversion chart! When in doubt, if you're using table salt just reduce the amount by half for baked goods. When cooking, I prefer to under-salt because you can always add more! If you've over-salted, adding a little bit of acid (like lemon juice) can help.

More Recipes You Might Like!
If you make this recipe, please leave a star rating at the bottom of the page! This provides helpful feedback to both me and other readers. And if you want more delicious, scratch-made recipes you can subscribe to my newsletter and follow along on Instagram, Pinterest, and Facebook!
Recipe Card

Chocolate Peanut Butter Pie
Special Equipment
Ingredients
Oreo Crust
- 24 oreo cookies
- 4 tablespoons unsalted butter , melted
Peanut Butter Filling
- 4 ounces cream cheese, room temperature (substitute mascarpone)
- ¾ cup creamy peanut butter
- ½ cup powdered sugar, divided
- ½ teaspoon vanilla extract
- ¼ teaspoon kosher salt
- ½ cup heavy whipping cream
Chocolate Ganache
- 4 ounces dark chocolate, chopped
- ½ cup heavy whipping cream
Garnish
- chocolate peanut butter cups, roughly chopped
Instructions
Oreo Crust
- Preheat the oven to 350°F.
- Pulse the Oreo cookies (filling and all) in a food processor until you have about 2 cups of finely ground crumbs.
- In a large bowl, combine the cookie crumbs and melted butter. Mix until it resembles wet sand.
- Press the mixture into the bottom of the pie pan and up the sides. Make sure it is tight and compact! You can use the bottom of a flat measuring cup to help pack down the crust.
- Bake the crust at 350°F for 8-12 minutes or until it's dried out.
- Let the crust fully cool to room temperature before filling.
Peanut Butter Filling
- In a large bowl, use a hand mixer to beat the softened cream cheese until smooth. Then add in the peanut butter and mix until fully combined.
- Add in ¼ cup of the powdered sugar, vanilla extract, and salt and mix on high for 3-4 minutes or until the peanut butter mixture is light and fluffy.
- In a separate bowl, beat together the heavy whipping cream and the remaining ¼ cup powdered sugar until stiff peaks form.
- Gently fold the whipped cream into the peanut butter mixture until fully combined.
- Pour the peanut butter filling into the cooled pie crust and smooth into an even layer.
- Chill in the fridge for at least 4 hours (overnight is even better) or until fully set.
Chocolate Ganache
- Finely chop the dark chocolate and place into a large bowl.
- Place the heavy cream in a microwave safe bowl and microwave for 1-2 minutes or until hot to the touch but not boiling. Pour over the chopped chocolate and let sit for about two minutes.
- Using a spatula, gently mix until the chocolate is fully melted and the ganache is fully combined and smooth.
- Pour the dark chocolate ganache over the chilled peanut butter layer and smooth into an even layer.
- Chill in the fridge for at least 2 hours or until the chocolate is fully set.
- If desired, garnish the chocolate peanut butter pie with chopped peanut butter cups before serving.
Notes
Nutrition
The nutritional information on this website is only an estimate and is provided for convenience and as a courtesy only. The accuracy of the nutritional information for any recipe on this site is not guaranteed.



Debbie says
Flavor is good. I bought an oreo crust. It might not have been big enough. I doubled the Ganache, it was more than my pie would hold. But it has not set up very good. Can this be frozen?
Being my first time on this kind of pie, I would give me a B+. My hubby said it was wonderful. Just need to get Chocolate a little more stiff.
Help
Kyleigh Sage says
Yes it can be frozen!
Amy Maskil says
Incredible! Perfect ratio of chocolate to pb 💕